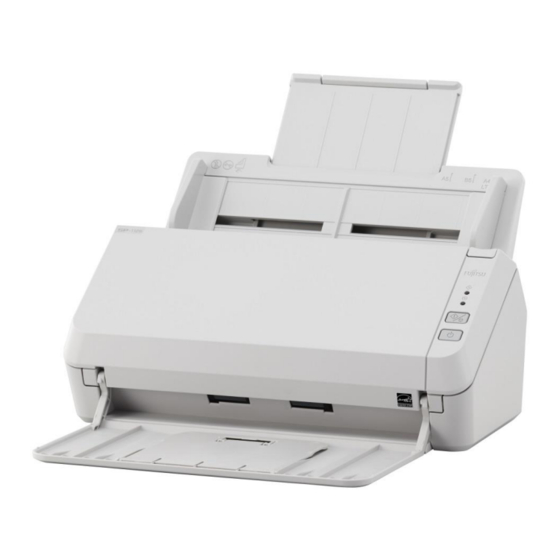
Summary of Contents for Fujitsu SP1120
- Page 1 SP1120\1125\1130 Consumable Replacement and Cleaning Instructions SP1120\1125\1130 CG00002-291501...
-
Page 2: Consumables And Replacement Cycles
SP1120\1125\1130 Consumable Replacement and Cleaning Instructions Consumables and Replacement Cycles Consumables need to be replaced periodically. It is recommended that you keep a stock of new consumables for replacement before it reaches the end of its life. The scanner records the number of... -
Page 3: Replacing The Roller Set
SP1120\1125\1130 Consumable Replacement and Cleaning Instructions Replacing the Roller Set The roller set consists of a brake roller and a pick roller. Replace each roller in the following procedure. Remove all documents from the ADF paper chute (feeder). Open the ADF. - Page 4 SP1120\1125\1130 Consumable Replacement and Cleaning Instructions Insert the protrusion on the shaft into the slot. Notch Brake Roller Protrusion Brake Roller Shaft Attach the shaft. a. Attach the notch, which is on the brake roller shaft, to the slot on the right then attach the left side of the shaft.
- Page 5 SP1120\1125\1130 Consumable Replacement and Cleaning Instructions Remove the pick roller. a. Open the side guide fully to both sides. Then place your finger into the depression and open the sheet guide in the direction of the arrow. Side Guide Depression...
- Page 6 SP1120\1125\1130 Consumable Replacement and Cleaning Instructions Attach a new pick roller from the bottom. a. Check the direction of the notch on the pick roller and of the small roller, and insert it in the hole. Small Roller Notch b. Close the sheet guide.
-
Page 7: Checking And Resetting The Sheet Counters
SP1120\1125\1130 Consumable Replacement and Cleaning Instructions Checking and Resetting the Sheet Counters Checking the sheet counters The status on each consumable part can be checked to determine when to replace the consumables. When a consumable needs to be replaced soon, the background color of the counter for the consumable changes. - Page 8 SP1120\1125\1130 Consumable Replacement and Cleaning Instructions Resetting the sheet counters When you have replaced or cleaned a consumable part, reset the corresponding counter by using the following procedure. Click the [Clear] button for the consumable that you replaced. Click the [OK] button in the Software Operation Panel.
-
Page 9: Cleaning Materials And Locations That Require Cleaning
(25/PK) 120001 ATTENTION In order to use the cleaning materials safely and correctly, read the precautions on each product thoroughly. For more information about the cleaning materials, contact your FUJITSU scanner dealer or an authorized FUJITSU scanner service provider. CG00002-291501... -
Page 10: Location And Frequency
SP1120\1125\1130 Consumable Replacement and Cleaning Instructions Location and Frequency Location Frequency Brake roller Every 3,000 sheets Pick roller Plastic idler roller Glass Ultrasonic sensor Feed roller Eject roller ATTENTION Cleaning cycles may vary depending on the condition of the documents. Also, cleaning must be performed more frequently when the following types of documents are scanned: •... -
Page 11: Cleaning The Outside
SP1120\1125\1130 Consumable Replacement and Cleaning Instructions Cleaning the Outside The outside of the scanner, including the ADF paper chute (feeder) and the stacker, should be cleaned with a piece of dry cloth, a cloth moistened with Cleaner F1/mild detergent, or a sheet of Cleaning Wipe. -
Page 12: Cleaning The Inside
SP1120\1125\1130 Consumable Replacement and Cleaning Instructions Cleaning the Inside Cleaning the ADF (with Cleaning Paper) The ADF can be cleaned with a sheet of Cleaning Paper moistened with Cleaner F1. As the scanner continues to feed the documents, paper dust will accumulate inside the ADF and it may cause scanning errors. -
Page 13: Cleaning The Adf (With Cloth)
SP1120\1125\1130 Consumable Replacement and Cleaning Instructions Cleaning the ADF (with Cloth) The ADF can be cleaned with a piece of cloth moistened with Cleaner F1 or a sheet of Cleaning Wipe. As the scanner continues to feed the documents, paper dust will accumulate inside the ADF and it may cause scanning errors. - Page 14 SP1120\1125\1130 Consumable Replacement and Cleaning Instructions ATTENTION Make sure that the cloth does not get caught and damage the document sensors. Pick roller (x 6) Brake roller (x 2) Gently wipe the surface as you rotate the roller manually, taking care not Remove the roller from the scanner.
- Page 15 SP1120\1125\1130 Consumable Replacement and Cleaning Instructions Ultrasonic sensor (x 2) Gently wipe dirt and dust off the surface of the ultrasonic sensors HINT If it is difficult to clean, use a cotton swab. Ultrasonic Sensor CG00002-291501...
- Page 16 SP1120\1125\1130 Consumable Replacement and Cleaning Instructions Feed roller (x 2)/Eject roller (x 2) The power must be turned on to rotate the feed/eject rollers for cleaning Turn on the scanner. When the operator panel is in ready status, open the ADF.
- Page 17 1250 East Arques Avenue Sunnyvale, CA 94085-4701 (800) 626-4686 (408) 746-7000 info@fcpa.fujitsu.com © 2015 Fujitsu Computer Products of America, Inc. All rights reserved, Fujitsu and the Fujitsu Logo are registered trademarks, ScanCare and ScanAid are trademarks of Fujitsu Computer Products of America, Inc All statements herein are valid only in the U.S.


