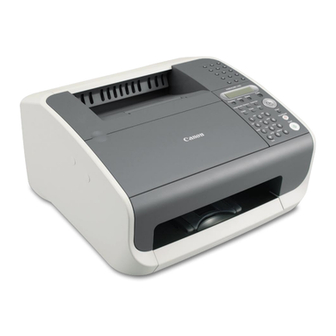
Summary of Contents for Canon FAX-L120
- Page 1 Starter Guide Please read this guide before operating this equipment. After you finish reading this guide, store it in a safe place for future reference.
-
Page 2: Set Up The Machine
Set Up the Machine Do You Have Everything? ● Machine ● Cartridge ● Power Cord ● Telephone Cable ● Destination Labels ● Starter Guide ● Basic Guide ● Manual CD (L100 only) ● Handset (optional) ● Handset Cradle (optional) ● Plugs with Pins (optional) ●... -
Page 3: Install Cartridge
Install Cartridge Remove the cartridge from the bag. Gently rock the cartridge several times to Pull out the seal completely. CAUTION Keep the bag for future use. distribute toner inside. NOTE Do not open the drum protective shutter (A). Do not pull out the seal at an angle. Open the document feeder tray. -
Page 4: Load Paper
Load Paper Load Paper EXEC Lift the paper stack cover and pull it out Pinch and slide the side paper guides to the size Pull out the paper guide rail as far as it will go. Fan the paper stack and even the edges. completely. -
Page 5: Connect Telephone Cables
Connect Telephone Cables and Install Handset Connect Telephone Cables Install Handset (Optional) Use a screwdriver to remove the covers on the Insert the plugs with pins (A) into the holes on left side of the machine. the handset cradle. NOTE Connect the supplied telephone cable to the line jack (A) and the wall jack. -
Page 6: Connect Power Cord
Connect Power Cord Connect Power Cord 1 6 : 0 0 S T D 1 0 0 % - S E T D O C . - F A X O N L Y Connect the power cord into the rear socket and The machine enters the standby mode. - Page 7 Set the Machine for Sending Faxes Register Sender Information The sender information you register in the machine appears in the header of each page received by You can enter the following characters in each input mode: your recipient. 06.MAY.2005 17:30 0123456789 YOUR NAME #0001...
-
Page 8: Sender Information
Register Sender Information Press [Menu]. Use [Up/Down] to select Use [Up/Down] to select Use the numeric buttons <USER SETTING?>, <1 DATE&TIME?>, then to enter hour (in 24-hour then press [OK]. press [OK]. format), minute, year, month, and day, and press [OK] twice. [OK] [Menu] 1 7 : 0 1... -
Page 9: Select The Receive Mode That Suits Your Needs
Set the Machine for Receiving Faxes Select the Receive Mode that Suits Your Needs Set the Receive Mode Press [Menu]. Use [Up/Down] to select Use [Up/Down] to select Follow the chart below to determine the right receive mode for your needs. <RX SETTING?>, then <5 RX MODE?>, then press [OK]. - Page 10 Install the Printer Driver (L120 only) Installation Procedure System Requirements Before Installation: • Do not connect the USB cable before installing the Microsoft Windows 98/98SE CPU: Intel 80486DX/66 MHz or faster software. If you connect the USB cable before Memory: 24 MB or more installing the software and the Found New Hardware Available Hard Disk Space: 355 MB or more Wizard screen appears, click [Cancel].
- Page 11 – If the machine exhibits a distinct change in performance, indicating a need for servicing. Copyright Copyright © 2005 by Canon, Inc. All rights reserved. No part of this publication may be reproduced, transmitted, transcribed, stored in a retrieval system, or translated into any language or computer language...
- Page 12 CANON INC. 30-2, Shimomaruko 3-chome, Ohta-ku, Tokyo 146-8501, Japan CANON U.S.A., INC. One Canon Plaza, Lake Success, NY 11042, U.S.A. CANON CANADA INC. 6390 Dixie Road Mississauga, Ontario L5T 1P7, Canada CANON EUROPA N.V. Bovenkerkerweg 59-61 1185 XB Amstelveen, The Netherlands CANON FRANCE S.A.S.


