Sign In
Upload
Manuals
Brands
Canon Manuals
All in One Printer
imageRUNNER 2530 Series
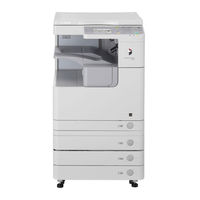
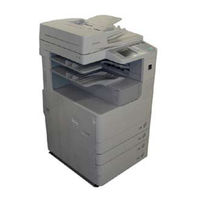
Canon imageRUNNER 2530 Series Manuals
Manuals and User Guides for Canon imageRUNNER 2530 Series. We have
2
Canon imageRUNNER 2530 Series manuals available for free PDF download: Service Manual
Canon imageRUNNER 2530 Series Service Manual (402 pages)
Brand:
Canon
| Category:
All in One Printer
| Size: 29.51 MB
Table of Contents
Service Manual
1
Table of Contents
4
Safety Precautions
11
Laser Safety
12
Handling of Laser System
12
Turn Power Switch on
12
Power Supply
13
Safety of Toner
13
About Toner
13
Toner on Clothing or Skin
14
Notes When Handling a Lithium Battery
14
Notes before Servicing
14
Points to Note at Cleaning
14
Notes on Assembly/Disassembly
15
1 Product Overview
16
Product Lineup
17
Host Machine
17
Option
18
Function Expanding Option
19
Features
20
Product Feature
20
Specifications
21
Power Consumption
22
Weight / Size
22
Productivity (Print Speed)
23
Paper Type
23
Name of Parts
25
External View
25
Cross Sectional View (550-Sheet 1St Cassete Model)
26
Cross Sectional View (250-Sheet 1St Cassette Model)
27
Operation
28
Power Switch
28
Control Panel
28
Main Menu
29
2 Technical Explanation
30
Basic Configuration
31
Functional Configuration
31
Basic Sequence
31
Original Exposure System
33
Overview
33
Reader Relay Pcb
34
Controls
36
Detecting the Size of Originals
39
Dirt Sensor Control
42
Image Processing
43
Shading Adjustment
45
Shading Correction
45
Controller System
46
Overview
46
Main Controller Pcb
47
Controls
48
Reader Unit Input Image Processing
49
Printer Unit Output Image Processing
50
Flow of Image Data According to Copy Functions
50
Flow of Image Data for the Send Function
51
Flow of Image Data for the Fax Transmission
51
Flow of Image Data for the Fax Reception Function
52
Flow of Image Data for the Pdl Function
52
Software Counter
52
Laser Exposure System
57
Overview
57
Controls
59
Controlling the Intensity of Laser Light
60
Apc Control
60
Controlling the Laser Scanner Motor
60
Image Formation System
63
Overview
63
Image Formation Process
64
Controls
66
Developing Unit
68
Developing Bias Control
68
Toner Container
69
Toner Level Detection
70
Transfer Unit
72
Waste Toner Box
73
Fixing System
76
Overview
76
Major Parts Configuration
77
Controls
78
User Mode Related to Fixing Grade
83
Protection Features
85
Pickup/Feed System
86
Overview
86
Parts Configuration
87
Controls
96
Registration Control
104
Embedded RDS
107
Product Overview
107
E-RDS Setup
107
Network Settings
108
Ip Address Settings
108
Dns Settings
109
Proxy Settings
109
Communication Log
112
Faq
113
Troubleshooting
113
Error Code and Strings
115
Service Cautions
118
3 Periodical Service
119
Consumable Parts and Cleaning Parts
120
Cleaning Parts
125
4 Disassembly/Assembly
126
List of Parts
127
List of Covers
127
List of Main Units / Parts
129
List of Clutches/Solenoids
130
List of Motors
132
List of Fans
133
List of Switches
134
List of Lamp,Heater,Others
135
List of Sensors
136
List of Pcbs
138
External / Internal Cover
140
Removing the Reader Left Cover
140
Removing the Reader
140
Removing the Support Cover
140
Removing the Delivery Tray
140
Removing the Front Cover
141
Removing the Lower Left Cover
141
Removing the Left Cover
142
Removing the Inside Base Cover
143
Installing the Inside Base Cover
143
Removing the Left Rear Cover
144
Removing the Toner Supply Cover
144
Removing the Reader Right Cover
145
Removing the Platen Glass
145
Removing the Reader Rear Cover
146
Removing the Rear Cover (Right)
146
Removing the Rear Cover (Left)
147
Removing the Rear Right Cover (Upper)
147
Removing the Rear Right Cover (Lower)
147
Removing the Lower Rear Cover
148
Removing the Cassette 2 Rear Cover
148
Main Unit
149
Removing the Right Cover Assembly
149
Removing the Cassette Pickup Assembly (550-Sheet 1St Cassette Model)
150
Removing the Cassette Pickup Assembly 1 (250-Sheet 1St Cassette Model)
151
Removing the Cassette Pickup Assembly 2 (250-Sheet 1St Cassette Model)
151
Removing the Laser Scanner Unit
152
Removing the Toner Supply Assembly
153
Removing the CIS Unit
155
Removing the Platen Glass
156
Removing the ADF Scan Glass
157
Removing the Control Panel Assembly
158
Removing the Multi Pickup Assembly
158
Periodic Replacing Parts,Durable Parts,Cleaning Parts
160
Removing the Transfer Roller
160
Removing the Separation Static Charge Eliminator
160
Removing the Waste Toner Container
160
Periodic Replacing Parts,Durable
160
Parts,Cleaning Parts
160
Removing the Drum Unit
161
Removing the Developing Assembly
161
Removing the Manual Feed Pickup Roller
162
Removing the Manual Feed Separation Pad
162
Removing the Fixing Unit
163
Removing the Cassette Pickup Roller (250-Sheet 1St Cassette Model)
163
Removing the Roller Cassette Separation Pad(250-Sheet 1St Cassette Model)
163
Removing the Cassette Pickup Roller (550-Sheet 1St Cassette Model)
164
Removing the Cassette Feed Roller (550-Sheet 1St Cassette Model)
164
Removing the Cassette Separation Roller (550-Sheet 1St Cassette Model)
164
Removing the Idler Gear (Only for 550-Sheet 1St Cassette Model for China)
164
Clutch / Solenoid
166
Removing the Clutch (CL1/CL2/CL3/CL4)
166
Removing the No. 1 Delivery Reversal Solenoid (SL3)
166
Motor
169
Removing the Main Motor (M1)
169
Removing the Fixing Motor (M2)
169
Removing the Cassette 1 Pickup Motor (M3)
170
Removing the Reversal Motor (M10)
171
Removing the Scanner Motor (M31)
171
Fan
173
Removing the Power Supply Cooling Fan (FAN6)
173
Switch
174
Removing the Front Door Switch (SW2)
174
Removing the Cassette Size Detection Switch (SW6/ SW7)
175
Lamp,Heater,Others
177
Removing the Fixing Film Unit
177
Removing the Pressure Roller
180
Pcb
181
Removing the Main Controller PCB
181
Removing the Reader Relay PCB
181
Removing the Power Supply PCB
182
Removing the DC Controller PCB
182
Removing the HVT PCB
183
Removing the Option Power Supply PCB
183
Removing the Heater PCB
184
Removing the RAM PCB
184
5 Adjustment
187
Overview
188
Adjustment When Replacing Parts
188
Image Position Adjustment
188
Basic Adjustment
190
Image Position Adjustment
190
Adjustment When Replacing the Parts
192
Original Exposure
192
Main Controller
193
Laser Exposure System
194
6 Troubleshooting
195
Initial Check
196
Initial Check Items List
196
Test Print
198
Overview
198
Select the Test Print TYPE
198
Troubleshooting Items
199
Troubleshooting Items List
199
Image Faults
199
Version Upgrade
204
Overview
204
Procedure
205
Service Call Request Function
208
7 Error/Jam/Alarm
209
Outline
210
Error Code
211
Error Code Details
211
FAX Error Code
219
Jam Code
223
Main Unit
223
Dadf-Ab1
226
Inner Finisher-B1
227
Alarm Code
229
Alarm Code Details
229
8 Service Mode
231
Overview
232
Outline of Service Mode
232
Using the Mode
233
Setting of Bit Switch
233
Back-Up
234
Service Label
234
Details of Service Mode
235
Sssw
235
Menu
248
Numeric
249
Scan
257
Print
270
Network
278
Codec
280
System
281
Acc
288
Counter
289
Lms
290
Clearing Counters
290
Method of Confirming License Option
291
Inactivity of the Transmitted License
292
Erasing a License
293
E-Rds
294
Report
294
System Data List
295
System Dump List
295
Counter List
297
Spec List
299
Download
300
Clear
301
Display
302
Rom
302
Test Mode
302
Remote UI Service Mode
312
Function Overview
312
How to Use
313
Report Display Function
313
9 Installation
315
How to Check this Installation Procedure
316
Illustrations Used in this Procedure
316
Symbols in the Illustration
316
Checking before Installation
317
Checking Power Supply
317
Checking the Installation Environment
317
Checking Installation Space
317
Points to Make before Installation
317
Option Installation Sequence
318
Unpacking
319
Unpacking the Machine and Removing the Packaging Materials
319
Checking the Contents
320
Installation Procedure
322
Installing the Toner Bottle
322
Installing the Drum Unit
322
Installing Trays
324
Setting the Cassettes
325
Installing Other Parts
326
Connecting the Cord
328
Initial Settings (Start Setup Guide)
329
Setting the Cassette Heater (if Equipping with the Cassette Heater)
330
Document Tray-J1
331
Installation Procedure
332
Card Reader-F1
334
Registering the Card Ids
340
Serial Interface Kit-J2
342
Copy Control Interface Cable-A1
345
System Upgrade RAM-C1
348
Cst Heater Kit-J1
351
Checking after Installation
357
Reader Heater Unit
358
Checking after Installation
364
Cassette Heater Unit-37
365
Checking after Installation
377
Drum Heater-C1
378
Checking after Installation
386
Appendices
387
Service Tools
388
General Circuit Diagram
389
Advertisement
Canon imageRUNNER 2530 Series Service Manual (110 pages)
Brand:
Canon
| Category:
Copier
| Size: 6.38 MB
Table of Contents
Table of Contents
2
Safety Precautions
5
CDRH Act
6
Laser Safety
6
Handling of Laser System
6
Turn Power Switch
7
Power Supply
7
Safety of Toner
8
About Toner
8
Toner on Clothing or Skin
8
Notes When Handling the Lithium and Ni-MH Batteries
8
Periodical Service
9
Consumable Parts and Cleaning Parts
9
Cleaning Parts
13
Adjustment
14
Adjustment When Replacing Parts
14
Image Position Adjustment
14
Adjustment When Replacing Parts
15
Scanning System
16
Action to Take after Replacing the CIS Unit
16
Action to Take after Replacing the Platen Glass
16
Action to Take after Replacing the ADF Scan Glass
17
Controller System
17
Action to Take after Replacing Themain Controller PCB
17
Action to Take When Replacing the DC Controller PCB
17
Action to Take after Replacing the RAM
18
Laser Exposure System
18
Action to Take after Replacing the Laser Scanner Unit
18
Image Position Adjustment
18
Margin Along the Leading Edge
18
Left Image Margin
19
Leading Edge Non-Image Width
19
Left Non-Image Width
19
Error Code Overview
20
Error Code
20
Error Code Details
21
FAX Error Codes
27
Outline
27
User Error Code
27
Service Error Code
28
Jam Code
29
Main Unit
29
Dadf-Ab1
31
Inner Finisher-B1
32
Alarm Code
33
Alarm Code Details
33
Service Mode
34
Outline
35
Outline of Service Mode
35
Using the Mode
36
Setting of Bit Switch
36
Outline
36
Details of Service Mode
37
Sssw
37
SSSW Composition
37
Details
37
Menu
45
Menu Switch Composition
45
Deatails
45
Numeric
46
Numerical Parameter Composition
46
Details
47
Scan
51
Setting of Scanner Functions (SCANNER)
51
Numeric Parameter Settings (Numeric Prama.)
53
Reader
54
Numerin Parameter Settings (Numeric Prama)
58
Service Soft Switch Settings (PRINTER)
59
List of Functions
60
List of Functions(PRINT CST)
63
Network
65
Confirmation of Contents of CA Certificate
65
Codec
65
Configuration
65
Details
65
System
65
Details of Bit Switch
65
Details of System Numeric
66
Acc
66
Configuration
66
Counter
67
Counters
67
Clearing Counters
67
Lms
68
Configuration
68
Outline
68
Details
68
Method of Confirming License Option
69
Inactivity of the Transmitted License
69
Erasing a License
70
E-Rds
71
Configuration
71
Details
72
Download
76
Clear
77
Configuration
77
Display
77
Rom
78
Configuration
78
Test Mode
78
Outline
78
Details
79
Parts Replacement and Cleaning
85
List of Parts
85
List of Covers
86
List of Main Units / Parts
88
List of Pcbs
89
List of Solenoids
90
List of Sensors
91
List of Motors
93
List of Fans
94
List of Switches
95
List of Clutches
96
Other
97
Product Overview
98
Specifications
98
Weight / Size
100
Productivity (Print Speed)
101
Paper Type
101
Pickup
101
Product Lineup
102
Host Machine
102
Host Machine Configuration
102
Model Type
102
Pickup Delivery / Image Reading Options
103
Function Expanding Option
104
Basic Configuration
105
Functional Configuration
105
Basic Sequence
105
Version Upgrading
106
Upgrading Targets and Procedure
106
Outline
107
Procedure
108
Advertisement
Related Products
Canon IMAGERUNNER 2020
Canon imageRUNNER 5075
Canon imageRUNNER 2000
Canon IMAGERUNNER 2016
Canon ImageRunner 5050
Canon imageRUNNER 2220 Series
Canon imageRUNNER 1025
Canon ImageRunner 600
Canon imageRunner 2018
Canon imageRUNNER2800
Canon Categories
Printer
Digital Camera
All in One Printer
Camcorder
Scanner
More Canon Manuals
Login
Sign In
OR
Sign in with Facebook
Sign in with Google
Upload manual
Upload from disk
Upload from URL