Sign In
Upload
Manuals
Brands
Toshiba Manuals
All in One Printer
e-studio 1101
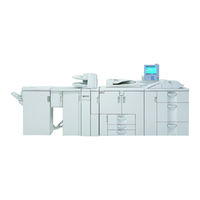
Toshiba e-studio 1101 Refurbished MFP Manuals
Manuals and User Guides for Toshiba e-studio 1101 Refurbished MFP. We have
2
Toshiba e-studio 1101 Refurbished MFP manuals available for free PDF download: Operator's Manual
Toshiba e-studio 1101 Operator's Manual (230 pages)
Copy/Document Server Reference
Brand:
Toshiba
| Category:
All in One Printer
| Size: 8.92 MB
Table of Contents
Manuals for this Machine
3
What You Can Do with this Machine
5
Types of Duplex Copies
5
Copying Book Originals
9
Combining Multiple Pages Onto a Single Page
11
Copying Originals such as Books
13
Table of Contents
15
Notice
21
How to Read this Manual
22
Symbols
22
Functions Requiring Optional Configurations
23
Display Panel
24
Simplified Display
25
User Tools Menu (Copier / Document Server Features)
26
General Features
26
Reproduction Ratio
27
Administrator Tools
30
Input / Output
30
1 Placing Originals
31
Originals
31
Sizes and Weights of Recommended Originals
31
Originals Not Recommended for the Auto Document Feeder (ADF)
32
Sizes Detectable by the Auto Paper Select
32
Sizes Difficult to Detect
34
Missing Image Area
34
Placing Originals
35
Original Orientation
35
Reverse Orientation
37
Placing Originals on the Exposure Glass
37
Placing Originals in the Auto Document Feeder
38
Batch Mode
40
SADF Mode
41
Mixed Size Mode
42
Thin Mode
43
Original Size
44
Regular Sizes
44
Custom Sizes
45
2 Copying
47
Basic Procedure
47
Interrupt Copy
48
Left Original Beeper
49
Copying Onto Tab Stock
49
Surplus Tab Stock Auto Eject
51
When Copying Onto OHP Transparencies
52
Auto Start
52
Job Preset
53
Job Preset Display
53
To Check Job Contents
54
To Change Job Contents after Checking
54
To Delete a Job after Checking Its Contents
55
Deleting a Job
55
Job List
56
Job List Screen
56
Checking Jobs in the Print Queue
58
Changing the Order of Jobs
58
Holding Print Jobs
59
Deleting Jobs
60
Checking Job History
60
Copying from the Multi Bypass Tray
61
Setting the Tab Stock in the Multi Bypass Tray (Tray 7)
63
When Copying Onto Regular Size Paper
64
When Copying Onto Custom Size Paper
64
When Copying Onto Special Paper
66
Copier Functions
67
Adjusting Copy Image Density
67
Auto Image Density
67
Manual Image Density
68
Combined Auto and Manual Image Density
68
Selecting the Original Type Setting
68
Selecting Copy Paper
70
Auto Paper Select
71
Manual Paper Select
71
Preset Reduce/Enlarge
73
Create Margin Function
74
Zoom
75
To Select the Ratio with [O] and [N]
75
To Enter the Ratio with the Number Keys
76
Auto Reduce/Enlarge
76
Size Magnification
78
Directional Magnification (%)
79
To Enter the Ratio with the Number Keys
79
To Specify a Ratio with [O] and [N]
80
Directional Size Magnification (Inch)
81
Sort
82
Sample Copy
83
Changing the Number of Sets
84
When Memory Is Full
84
Shift Tray off in Sort/Stack
85
Separation
85
Stack
86
Staple
87
Punch
89
Edges Full Bleed
91
Z-Fold
92
Using the Z-Fold Support Tray
92
Z-Fold Positions and Z-Folding Copies
92
Duplex
93
Originals and Copy Orientation
96
One-Sided Combine
97
Two-Sided Combine
100
Series Copies
103
Booklet/Magazine
105
Creep Adjustment
110
MIX 1 & 2 Sided
111
Scanning Position
112
Margin Adjustment
114
Erase
115
Border Erase (same Width)
116
Border Erase (Different Width)
117
Center/Border Erase (same Width)
118
Center/Border Erase (Different Width)
119
Inside Erase
120
Outside Erase
121
Background Numbering
122
Preset Stamp
123
Changing the Stamp Position, Size and Density
125
User Stamp
126
Changing the User Stamp Position
128
To Program the User Stamp
129
To Delete the User Stamp
131
Date Stamp
132
To Change the Format of Date
134
To Change the Date Stamp Position
135
Page Numbering
136
Changing the Stamp Position
138
Specifying the First Printing Page and Start Number ("P1,P2
139
Specifying the First Printing Page and Start Number ("1/5,2/5
140
Specifying the First Printing Page and Start Number ("1-1,1-2
141
Stamp Text
142
Changing the Stamp Position
143
Image Repeat
143
Double Copies
145
Centering
146
Positive/Negative
148
Covers
149
Designate
151
Chapters
152
Designation Sheet Copy
153
Blank Slip Sheets
155
Slip Sheets
156
Copy Face up
158
Storing Originals in the Document Server
159
Programs
161
Storing a Program
161
Changing a Stored Program
162
Deleting a Program
163
Recalling a Program
163
Programming Defaults in Initial Display
164
3 Connect Copy
165
What Is Connect Copy
165
How It Works
166
Machine Types and Options
166
Interrupt Copy
166
Before You Start
167
Connect Copy Display Panel
168
Display Panel of the Sub-Machine
170
Using Connect Copy
171
Order of Copy Output
173
Auto Reset When Using Connect Copy
174
Auto off
174
Exiting Connect Copy
175
Copying Stored Documents Using Connect Print
176
Using Job Preset in Connect Copy
178
Connect Copy Job Flow
180
When One of the Two Machines Is Idle
180
Using the Idle Machine as the Main Machine (Connect Copy)
180
Using the Machine Currently Copying as the Main Machine (Connect Copy: Job Preset)
181
When both Machines Are in Use
182
When both Machines Are Copying the same Number of Originals (Connect Copy: Job Preset)
182
When One Machines Is Copying a Larger Number of Originals (Connect Copy: Job Preset)
183
4 Document Server
185
Relationship between Document Server and Other Functions
185
Document Server Display
186
Simplified Display
187
Preview Display
188
Using the Document Server
190
Storing Data
190
To Register or Change a User Name (When Using a User Name Registered to the Address Book)
192
To Register or Change a User Name (When Using a User Name Not Registered to the Address Book)
193
To Register or Change a User Name (When no Name Is Registered to the Address Book)
194
To Change a File Name
194
To Set or Change a Password
195
Changing User Name, File Name or Password of a Stored Document
196
Checking the Details of a Stored Document
197
Searching for a Stored Document
198
To Search by File Name
198
To Search by User Name
199
Printing a Stored Document
200
When Interrupting Printing
201
Changing Number of Print Copies While Printing Is in Progress
202
Sample Print
202
Printing the First Page
203
Printing a Specified Page
204
Printing a Specified Range
204
Edit File
205
Combining Files
205
Inserting Documents
206
Deleting Pages
206
Copying Documents
207
Print Backup
208
Deleting a Document
208
Displaying a Document in Document Server with Web Image Monitor
209
Downloading Stored Documents
210
5 Appendix
211
Function Compatibility
211
Supplementary Information
213
Index
224
Advertisement
Toshiba e-studio 1101 Operator's Manual (120 pages)
Brand:
Toshiba
| Category:
All in One Printer
| Size: 5.59 MB
Table of Contents
Troubleshooting
1
Manuals for this Machine
3
Table of Contents
5
How to Read this Manual
7
Symbols
7
Names of Major Items
8
1 When the Machine Does Not Operate as Wanted
9
Indicators
9
Panel Tone
10
Checking Machine Status and Settings
11
When an Indicator to the Left of a Function Key Is Lit
14
When You Have Problems Operating the Machine
15
Document Server
18
When a Job Is Not Performed
20
2 Troubleshooting When Using the Copy Function
23
When a Message Appears
23
Connect Copy
26
Display During Connect Copy
28
If Connect Copy Is Cancelled
29
If You Cannot Exit from Connect Copy
30
When You Cannot Make Clear Copies
31
When You Cannot Make Copies as Wanted
33
When Memory Is Full
36
3 Troubleshooting When Using the Printer Function
37
When a Message Appears During Installation of the Printer Driver
37
Windows 95/98/Me
37
Windows 2000
38
Windows XP, Windows Server 2003
38
Windows NT 4.0
39
If USB Connection Fails
40
When a Message Appears
41
Status Messages
41
Alert Messages
42
Checking the Error Log
43
When You Cannot Print
44
Other Printing Problems
46
4 Troubleshooting When Using the Scanner Function
51
When Scanning Is Not Done as Expected
51
When You Cannot Send Scanned Files
52
When Stored Files Cannot be Accessed
52
When You Cannot Browse the Network to Send a Scan File
52
When the TWAIN Driver Cannot be Started
52
When Stored Files Cannot be Edited
53
Operations Are Not Possible When Messages Appear
53
When a Message Is Displayed
54
When a Message Is Displayed on the Control Panel
54
When a Message Is Displayed on the Client Computer
60
5 Adding Paper, Toner and Staples
65
Loading Paper
65
Loading Paper into Tray 1 (Tandem Tray)
65
Loading Paper into the A3/11" × 17" Tray Unit
67
Loading Paper into Tray 2 and 3
68
Loading Paper into the Large Capacity Tray (LCT)
69
Loading Paper into the Wide Large Capacity Tray (Wide LCT)
70
Loading Paper into the Multi Bypass Tray (Tray 7)
71
Loading Paper in the Interposer
73
Changing the Paper Size
76
Changing the Paper Size in Tray 2 and 3
76
Changing the Paper Size in the Large Capacity Tray (Tray 4 and 5)
78
Changing the Paper Size in the Wide Large Capacity Tray
82
Changing to a Size that Is Not Automatically Detected
84
Pausing Copy When Using Finisher
87
Adding Toner
88
Inserting Toner
90
Used Toner
90
Adding Staples
91
Finisher
91
Booklet Finisher (Saddle Stitch)
92
6 Clearing Misfeeds
93
Removing Jammed Paper
93
Locating Jammed Paper
94
Removing Jammed Paper
96
When Z-Folded Paper Is Not Properly Aligned
105
Removing Jammed Staples
106
Finisher
106
Booklet Finisher (Saddle Stitch)
107
Removing Punch and Staple Waste
108
Finisher
108
7 Remarks
109
Where to Put Your Machine
109
Machine Environment
109
Moving
110
Power Connection
111
Access to the Machine
112
Maintaining Your Machine
113
Cleaning the Exposure Glass
113
Cleaning the Auto Document Feeder
114
Earth Leakage Circuit Breaker
115
Index
117
Advertisement
Related Products
Toshiba e-studio 151
Toshiba e-studio 151D
Toshiba e-studio 162
Toshiba e-studio 162D
Toshiba e-studio 166
Toshiba E-studio 1355
Toshiba e-studio 167
Toshiba e-Studio 1207
Toshiba e-studio 180s
Toshiba e-STUDIO e-STUDIO 523
Toshiba Categories
Laptop
Air Conditioner
TV
LCD TV
All in One Printer
More Toshiba Manuals
Login
Sign In
OR
Sign in with Facebook
Sign in with Google
Upload manual
Upload from disk
Upload from URL