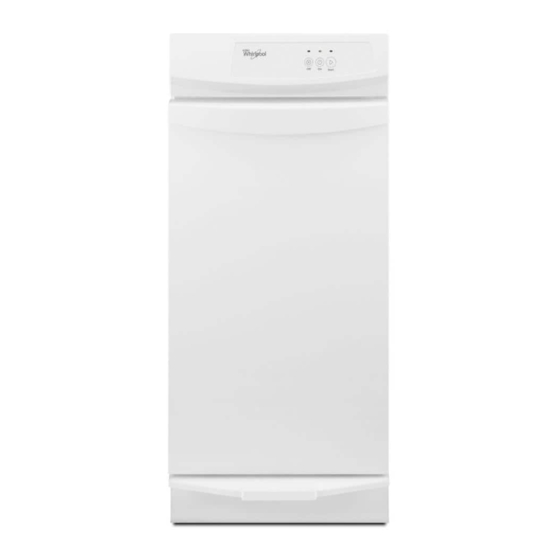
Whirlpool GC900QPPQ User Instructions
For console models
Hide thumbs
Also See for GC900QPPQ:
- Manual (28 pages) ,
- Use and care manual (16 pages) ,
- Dimension manual (1 page)
Advertisement
Quick Links
THANK YOU for purchasing this high-quality product. If you should experience a problem not covered in the
TROUBLESHOOTING section, please visit our website at www.whirlpool.com or call us at
You will need your model and serial number, located on the right-hand side, behind the compactor drawer.
COMPACTOR SAFETY ....................................................................................2
INSTALLATION REQUIREMENTS ...................................................................3
INSTALLATION INSTRUCTIONS .....................................................................4
COMPACTOR USE ...........................................................................................8
COMPACTOR CARE ......................................................................................10
TROUBLESHOOTING ....................................................................................12
WARRANTY ....................................................................................................15
W11034804A
COMPACTOR
USER INSTRUCTIONS
FOR CONSOLE MODELS
TABLE OF CONTENTS
.
1-800-253-1301
Advertisement

Summary of Contents for Whirlpool GC900QPPQ
-
Page 1: Table Of Contents
FOR CONSOLE MODELS THANK YOU for purchasing this high-quality product. If you should experience a problem not covered in the TROUBLESHOOTING section, please visit our website at www.whirlpool.com or call us at 1-800-253-1301 You will need your model and serial number, located on the right-hand side, behind the compactor drawer. -
Page 2: Compactor Safety
COMPACTOR SAFETY IMPORTANT SAFETY INSTRUCTIONS WARNING: When using an electrical appliance, basic precautions should always be followed, including the following: Read all instructions before using the compactor. Do not compact toxic or volatile ammable material such as oily rags and insect sprays. Do not compact lighted Close supervision is necessary when used by or near cigarettes, cigars, or other hot or burning items. -
Page 3: Installation Requirements
INSTALLATION REQUIREMENTS Location Requirements Clearance Dimensions Product Dimensions " (86.7 cm) 24" (61.0 cm) 15" (38.1 cm) A. Leave 6" (15.2 cm) of clearance space to the right side of the compactor in order to remove the compactor bags. Cutout Dimensions B. -
Page 4: Installation Instructions
INSTALLATION INSTRUCTIONS Tools Installer: Leave User Instructions with the homeowner. Homeowner: Keep User Instructions for future reference and for local electrical inspector’s use if required. Tools needed Gather the required tools and parts before starting installation: Level Phillips No. 2 screwdriver Tape measure Flat-head screwdriver Pliers... - Page 5 Undercounter Installation Cabinet Proper installation is your responsibility. Make sure you have everything necessary for correct installation. It is the personal responsibility and obligation of the customer to contact a qualified installer to assure that electrical installation meets all national and local codes and ordinances. Position 1 Locating stud NOTE: Installation hardware is not provided for the freestanding...
- Page 6 7. Using the two #8-18 x 1/2" (13 mm) screws (provided), 3. Use a ruler and a pencil or chalk to draw a line between the fasten the retaining brackets to the countertop with the marks on each side of toe guard. Use scissors or utility knife mounting screws.
- Page 7 Bend this tab 90 degrees as shown. Preparing for Custom Panel Installation Tab bent 90 degrees to Tab orientation as supplied stop custom panel from Handle Front panel screws going below this point. Handle Screws Front panel 8. Place the custom panel against the container front and rest it on the tab.
-
Page 8: Compactor Use
COMPACTOR USE WARNING How Your Compactor Works The compacting ram is the part of the compactor which compresses the trash. IMPORTANT: The compacting ram stops 7" (18 cm) from the bottom of the drawer. You will not see compacting of trash until the drawer is more than half full. - Page 9 Removing a Filled Bag Installing a New Bag Do not use any kind of bag other than those designed specifically WARNING for use in your compactor. Order replacement compactor bags through your local dealer or by calling the toll-free number on the cover or in the “Accessories”...
-
Page 10: Compactor Care
COMPACTOR CARE Remove the drawer side by lifting it out of the drawer. Your new compactor is designed to give you many years of dependable service. However, there are a few things you are expected to do in order to properly maintain your compactor. This section will tell you how to clean and care for your compactor. - Page 11 To order, contact your local authorized dealer. In the U.S.A. visit our webpage www.whirlpool.com or call 1-800-253-1301. In Canada, visit our webpage www.whirlpoolparts.ca or call: 1-800-807-6777.
-
Page 12: Troubleshooting
TROUBLESHOOTING Try the solutions suggested here first in order to possibly avoid the cost of an unnecessary service call. PROBLEM POSSIBLE SOLUTION COMPACTOR WILL Check that the power supply cord is plugged into a grounded 3 prong outlet. NOT OPERATE Check the type of wall plug the compactor is plugged into. - Page 13 NOTES...
- Page 14 NOTES...
-
Page 15: Warranty
Please take a few minutes to review the Troubleshooting section of the Use and Care Guide or visit producthelp.whirlpool.com. 2. All warranty service is provided exclusively by our authorized Whirlpool Service Providers. In the U.S. and Canada, direct all requests for... - Page 16 W11034804A ® /™ ©2018 Whirlpool. Used under licence in Canada. All rights reserved. 03/18...


![Trash Compactor Whirlpool [12:36:03] ?????????????????: GC900QPPB Use & Care Manual](https://static-data2.manualslib.com/product-images/d0b/614777/60x60/whirlpool-12-36-03-gc900qppb-trash-compactor.jpg)


