Table of Contents
Advertisement
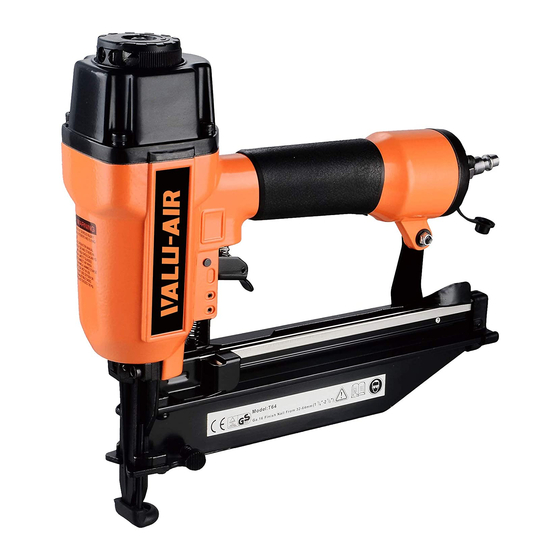
AIR-POWERED FINISH NAILER
Residual Risks
Even when the tool is used as prescribed it is not possible to eliminate all residual risk factors.
The following hazards may arise in connection with the tool's construction and design:
MODEL T64C
INSTRUCTION MANUAL
IMPORTANT:
Read all safety rules and operating Instructions
carefully before starting the product.
Keep this Manual for future reference.
Advertisement
Table of Contents

Summary of Contents for Valu-air T64C
- Page 1 AIR-POWERED FINISH NAILER MODEL T64C INSTRUCTION MANUAL IMPORTANT: Read all safety rules and operating Instructions carefully before starting the product. Keep this Manual for future reference. Residual Risks Even when the tool is used as prescribed it is not possible to eliminate all residual risk factors.
-
Page 2: Table Of Contents
TABLE OF CONTENTS: TECHNICAL SPECIFIACTIONS SAFETY GUIDELINES UNPACKING KEY PARTS DIAGRAM IMPORTANT INFORMATION TYPES OF FASTENERS OPERATING INSTRUCTIONS MAINTENANCE TROUBLESHOOTING EXPLODED VIEW PARTS LIST TECHNICAL SPECIFIACTIONS: Magazine capacity(QTY.) 100pcs Nailer Drives... - Page 3 This manual contains information that relates to protecting personal safety and preventing equipment problems.it is very important to read this manual carefully and understand it thoroughly before using the product.the symbols listed below are used to indicate this information DANGER! Potential hazard that will result in serious injury or loss of life.
- Page 4 -Protect the air hose and the power cord from damage and puncture. Inspect them for weak or worn spots every week, and replace them if necessary . -Always wear hearing protection when using the air compressor. Failure to do so may result in hearing loss. -Do not carry the compressor while it is running.
-
Page 5: Unpacking
When you are completely satisfied with the condition of the shipment, you should inventory the equipment. -After you open the nailer box, you should find the following. Model T64C Inventory (Figure 1) A. T64C Finish Nailer…......1 B. -
Page 6: Types Of Fasteners
Verify that all of the connections in the air supply system are sealed in order to prevent air from leaking. Description Description Description VALU-AIR Air powered 2 in 1 nailer Air Hose Filter Quick connector Lubricator Cut-off valve Quick coupler Regulator(0 to 8.3 Bar) -
Page 7: Operating Instructions
OPERATING INSTRUCTIONS To load your nailer: 1. DISCONNECT NAILER FROM THE AIR SUPPLY! 2. Pull pusher (B) back to magazine rail until it locked into Pusher hook(B-1). Figure 3. Catch lever engaged and magazine pusher retracted. 3. Insert a strip of Finish nailer, pointed-end down, into the magazine as shown in Figure 4. Be sure the fasteners are pointed DOWNWARD.Only those fasteners specified under TECHNICAL DATA may be used Figure 4. - Page 8 Operating If you have not read the safety instructions in this manual, do not operate the nailer. Before you operate your nailer, place two to three drops of the included oil into the quick connect fitting where the nailer connects to the air supply. To operate your nailer: 1.
- Page 9 Single Fire Operation SINGLE SEQUENTIAL MODE The tool is specially designed for single sequential mode. This mode requires the trigger to be pulled each time a fastener is driven. The tool can be actuated by depressing the work contact element against the work surface followed by pulling the trigger The trigger must be released to reset the tool before another fastener can be driven.
-
Page 10: Maintenance
To replace a piston and O-ring: 1. DISCONNECT NAILER FROM THE AIR SUPPLY! 2. Remove all nails from the magazine. 3. Remove the four cap screws on the head of the nailer, near the exhaust port. 4. Remove the cap. 5. -
Page 11: Troubleshooting
TROUBLESHOOTING (See Table 1) The following chart lists common operating system issues and solutions.please read it carefully and follow all instructions closely. DANGER! Potential hazard that could result in serious injury or loss of life. If any of the following symptoms appear while the tool is in use,turn it off and disconnect it from the air supply immediately. - Page 12 Explosive View and Parts list Issue date: Version no.: No. Figure number Description Qty. No. Figure number Description Qty. No. Figure number Description Qty. No. Figure number Description Qty. Bolt Cylinder Cover Washer Adjust nut Magazine pin Thrust spring Gun Body Air Deflector Rivet 3*7 O-ring 10*1.8...

