Advertisement
Quick Links
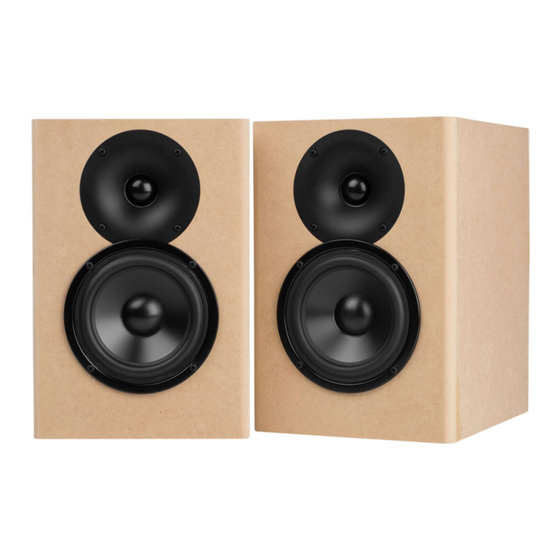
Thank you for purchasing the C-Sharp powered bookshelf speaker kit. This speaker kit was
precision cut using CNC machinery for the best possible fit and finish. With a little time and
patience, your finished product will provide years of enjoyment. Please follow the following
instructions for the best possible results.
The C-Sharp kit is available as a complete kit with knock-down enclosures (part # 300-7043) or a
components only kit (part # 300-7045) if you would like to build your own enclosure. If you
purchased the components only version of the C-Sharp you can find detailed drawing of the
enclosure at the end of this manual and you can begin these instructions on step # 7.
Suggested tools and consumables:
Drill
5/64" drill bit
Wood clamps (you can never have too many of these)
Sanding block and/or electric finishing sander
Wood glue
0.11" female disconnect terminal
0.205" female disconnect terminal
Package contents:
First, empty the contents of the package and review parts to ensure everything has been included
and is in good condition. If any parts are missing or damaged please contact our customer service
department at 1-800-338-0531.
Note: Crossover components may be substituted with parts of equal of higher quality depending
on stock.
A) 1-3/8" ID adjustable port tube
B) Dayton Audio ND25FW-4 1" Soft Dome Neodymium Tweeter with Waveguide
C) Dayton Audio DSA135-8 5" Designer Series Aluminum Cone Woofer
C-Sharp Bookshelf Speaker Kit
Components:
Rag or paper towels
Solder
Soldering iron
Hot glue gun
Polyurethane glue (Gorilla Glue)
Cyanoacrylate Adhesive (super glue)
Advertisement

Summary of Contents for Parts Express C-Sharp Bookshelf Speaker Kit
- Page 1 C-Sharp Bookshelf Speaker Kit Thank you for purchasing the C-Sharp powered bookshelf speaker kit. This speaker kit was precision cut using CNC machinery for the best possible fit and finish. With a little time and patience, your finished product will provide years of enjoyment. Please follow the following instructions for the best possible results.
- Page 2 D) 2 x 0.25 mH air core inductor – component L2 E) 2 x 1.40 mH air core inductor – component L1 F) 2 x 6 ohm resistor – component R1 G) 4 x 2.0 µF capacitor – component C2 and C3 H) 2 x 5.1 µF capacitor –...
-
Page 3: Enclosure Assembly
Enclosures: M) Front x 2 N) Mater Back (R etched onto the inside surface) x 1 O) Master Top (R etched onto the inside surface) x 1 P) Slave Back x 1 Q) Slave Top x 1 R) Bottom x 2 S) Sides x 4 Enclosure Assembly: Note: If you purchased the Components Only version of the C-Sharp then the enclosure is not... - Page 4 Next, glue all mating surfaces of the top panel and the other side panel and secure them in place with clamps so that even pressure is applied to all glued surfaces. Using a damp rag or paper towel wipe away any glue squeeze-out on the outside of the enclosure (excess glue on the inside is fine).
-
Page 5: Crossover Assembly
Crossover assembly: 7) Begin by preparing the input, woofer, midrange, and tweeter wires. Cut one 8" piece of 16 AWG 2-conductor Wire Red/Black (N) and label this wire "input". Then cut two more 12" pieces of 16 AWG 2-conductor Wire Red/Black (N) and label these "woofer" and "tweeter". - Page 6 Strip approximately 1/2" of insulation from only one end of each of the wires you cut in step #7 and make sure the strands are tightly twisted together. Using a soldering iron apply heat to the stripped ends and tin the bare copper as shown below. Note: When tinning the ends only apply gentle pressure to the wire to prevent flattening the twisted strands.
- Page 7 12) The C-Sharp Crossover Printed Circuit Board (Q) is labeled to make it easy to locate and install the corresponding components and cables. Working from one side of the board to the other, insert the leads (or wires) through the corresponding holes in the crossover board and solder into place. Tips: 1) Elevate the board a couple inches so you will not have to deal with trimming the leads until the crossover is complete.
-
Page 8: Final Assembly
Final Assembly: 15) Insert crossover through woofer hole of both enclosures and glue crossover to the bottom of the enclosure (polyurethane glue, high temperature hot glue gun, or epoxy is recommended). Make sure the crossover with the 2-pin amplifier output connection is installed in the master (right) speaker enclosure. - Page 9 19) Set the included gasket in place on the back of the LP40PA plate amplifier. Position the LP40PA amplifier module near the simplifier cutout in the back of the master (right) speaker. Plug the 2-pin speaker wire connection and the 4-pin control panel data cable into the appropriate connectors on the LP40PA amplifier board (these connectors are keyed and will only go in one way, do not try to force the connector into place).
- Page 10 LP40PA Plate Amplifier Operating Manual:...
- Page 12 C-Note Crossover Schematic:...
- Page 14 Amplifier Installation (Master): A 1-3/4" H x 2-3/4" W cutout is required to install the amplifier module. Make sure that the amplifier is located where it will not interfere with the crossover. Control Module Installation (Master): A 25/32" H x 2-19/32" W cutout is required to install the control module.


