Sign In
Upload
Manuals
Brands
Canon Manuals
All in One Printer
ImageRunner iR8500 Series
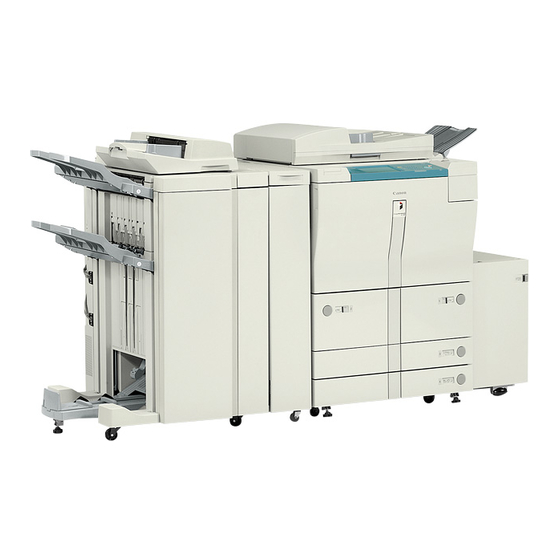
Canon ImageRunner iR8500 Series Printer Manuals
Manuals and User Guides for Canon ImageRunner iR8500 Series Printer. We have
5
Canon ImageRunner iR8500 Series Printer manuals available for free PDF download: Service Manual, Servise Manual, Function Manual
Canon ImageRunner iR8500 Series Service Manual (1122 pages)
Brand:
Canon
| Category:
All in One Printer
| Size: 19.67 MB
Table of Contents
Table of Contents
7
Service Manual
1
Chapter 1 Introduction
33
Product Specifications
35
System Construction
37
System Configuration
37
System Configuration
38
Printing/Transmitting Accessories System Configuration
39
Printing/Transmitting Accessories System Configuration
40
Printing/Transmitting Accessories System Configuration
41
Product Specifications
43
Features
43
High Speed, High Quality
43
High Durability, High Reliability
43
High-Performance Controller, Large-Capacity Hard Disk
43
Ease of Operation
43
Large-Capacity Paper Source
43
Various Delivery Processing (with Options)
44
High-Level Printer Functions to Support Networking Requirements(Ir105)
45
Support for MEAP (Multifunctional Embedded Application Platform)
45
Names of Parts
45
External View
45
External View
47
Cross Section
49
Cross Section
50
Cross Section
51
External Covers
53
External Covers
55
External Covers
57
Using the Machine
59
Power Switch
59
Power Switch
60
Power Switch
61
Points to Note When Turning off the Main Power Switch
62
Points to Note When Turning off the Main Power Switch
63
Points to Note When Turning off the Main Power Switch
64
Control Panel
65
Control Panel
66
Extension Mode Items
67
User Mode Items
68
Common Settings
68
Common Settings
69
Common Settings
70
Timer Settings
71
Adjustment/Cleaning
71
Report Settings
72
Adjustment/Cleaning
72
Copy Settings
73
System Settings
73
Report Settings
73
System Settings
74
Network Settings (in "System Settings")
75
Copy Settings
78
Communications Settings
79
Copy Settings
79
Mail Box Settings
80
Address Book Settings
80
Safety
80
Safety of Laser Light
80
CDRH Ordinances
81
CDRH Ordinances
82
Handling the Laser System
82
Handling the Laser System
83
Handling the Laser System
84
Safety of Toner
85
Product Specifications
85
Sepecifications
85
Sepecifications
87
Sepecifications
88
Function List
90
Print Speed
90
Print Speed
91
Print Speed
93
Paper Type
94
Chapter 2 Installation
99
Making Pre-Checks/Unpacking and Installation
101
Making Pre-Checks
103
Selecting the Site
103
Selecting the Site
104
Selecting the Site
106
Selecting the Site
108
Points to Note before Starting the Work
110
Points to Note before Starting the Installation Work
111
Checking the Components
111
Checking the Components
112
Checking the Components
113
Checking the Components
114
Unpacking and Installation
115
Unpacking
115
Unpacking
117
Mounting the Scanner System
119
Unpacking
119
Unpacking
122
Installing the Fixing Assembly
124
Mounting the Fixing Assembly
124
Mounting the Scanner System
125
Mounting the Charging Assembly
126
Mounting the Fixing Assembly
127
Mounting the Fixing Assembly
128
Checking the Developing Assembly
129
Mounting the Charging Assembly
129
Mounting the Charging Assembly
131
Mounting the Pickup Assembly
133
Checking the Developing Assembly
134
Mounting the Control Panel
135
Mounting the Pickup Assembly
137
Mounting the Pickup Assembly
138
Supplying the Toner
139
Supplying the Toner
140
Supplying the Toner
141
Mounting the ADF
141
Connectors
141
Installing the ADF
142
Cassette
142
Cassette
143
Index Paper Attachment
143
Other Attachment
144
Attaching the Labels, Setting Paper, Checking Images/Operations, and User Mode
145
Attaching the Labels, Setting Paper, Checking Images/Operations, and User Mode
146
Attaching the Labels, Setting Paper, Checking Images/Operations, and User Mode
147
Attaching the Labels, Setting Paper, Checking Images/Operations, and User Mode
148
Changing the Paper Size for the Front Deck (Right, Left)
150
If Not Connected to a Network
151
Changing the Paper Size for the Front Deck (Right, Left)
151
If Not Connected to a Network
152
Checking the Connection to the Network
153
Overview
153
Using the PING Function
153
Making a Check Using a Remote Host Address
155
Troubleshooting the Network
156
Overview
156
Making a Check Using a Loopback Address
156
Making a Check Using a Local Host Address
156
Making a Check Using a Local Host Address
157
Installing the Card Reader
158
Checking the Contents
158
Installing the Card Reader-D1
163
Installing the Card Reader-D1
166
Installing the Card Reader-D1
169
Installing the NE Controller
174
Installing the NE Controller-A1/NE Controller-B1/Copy Data Controller-A1
174
Installing the NE Controller-A1/NE Controller-B1/Copy Data Controller-A1
176
Installing the NE Controller-A1/NE Controller-B1/Copy Data Controller-A1
178
Chapter 3 Basic Operation
181
Construction/Basic Sequence
183
Construction
185
Functional Construction
185
Connection Diagram of the Major Pcbs(Ir105)
185
Functional Construction
186
Wiring Diagram of the Major Pcbs
187
Wiring Diagram of the Major Pcbs
188
Wiring Diagram of the Major Pcbs
189
Inputs to the DC Controller PCB (1/6)
190
Inputs to the DC Controller PCB (2/6)
191
Inputs to the DC Controller PCB (3/6)
192
Inputs to the DC Controller PCB (4/6)
193
Inputs to the DC Controller PCB (5/6)
194
Inputs to the DC Controller PCB (6/6)
195
Outputs from the DC Controller PCB (1/7)
196
Outputs from the DC Controller PCB (2/7)
197
Outputs from the DC Controller PCB (3/7)
198
Outputs from the DC Controller PCB (4/7)
199
Outputs from the DC Controller PCB (5/7)
200
Outputs from the DC Controller PCB (6/7)
201
Outputs from the DC Controller PCB (7/7)
202
Controlling the Main Motor (M1)
203
Basic Sequence
205
Basic Sequence of Operations (Power-On)
205
Chapter 4 Main Controller
207
Table of Contents
209
Construction
211
Functional Construction(Ir105)
211
Construction/Function
211
Construction of the Electrical Circuitry
214
Outline(Ir105)
214
Main Controller PCB
214
Main Controller PCB(Ir105)
215
Hard Disk Drive(Ir105)
215
Main Controller PCB
215
Outline(Ir105)
216
Overview
216
Start-Up Sequence(Ir105)
216
Start-Up Sequence
217
Start-Up Sequence
218
Start-Up Sequence
219
Construction of the System Software(Ir105)
221
E602 in Detaill
221
Shut-Down Sequence
227
Overview
227
Flow of Operation
227
Image Processing
228
Outline(Ir105)
228
Overview of the Image Flow
228
Input Image Processing(Ir105)
229
Construction of the Image Processing Module
229
Construction of the Image Processing Module
230
Controlling the Image Memory(Ir105)
231
Reader Unit Input Image Processing
231
Output Image Processing(Ir105)
231
Compression/Extension/Editing Block
232
Printer Unit Output Image Processing
232
Flow of Image Data
234
Flow of Image Data for the Copy Function
234
Flow of Image Data for the Box Function
234
Flow of Image Data for the SEND Function
235
Flow of Image Data for the PDL Function
235
Parts Replacement Procedure
236
Main Controller Box
236
Removing the Rear Cover
236
Removing the System Connector Cover
236
Removing the Main Controller Box
236
Main Controller PCB
237
Removing the Rear Cover
237
Removing the Main Controller Box Cover
238
Removing the Differential Pcb/Differential PCB Relay Board
238
Removing the Pixel/Line Conversion PCB
238
Removing the Main Controller PCB
238
When Replacing the Main Controller PCB
239
Boot ROM
239
Removing the Rear Cover
239
Removing the Main Controller Box Cover
240
Removing the Boot ROM
240
Differential PCB
240
Removing the Rear Cover
240
Removing the Main Controller Box Cover
241
Removing the Differential Pcb/Differential PCB Relay Board
241
Hdd
241
Points to Note on Handling the Hard Disk
241
Removing the Rear Cover
241
Removing the Rear Cover
242
Removing the Main Controller Box Cover
242
Removing the Differential Pcb/Differential PCB Relay Board
242
Points to Note on Attaching the Hard Disk
243
When Replacing the HDD
243
Controller Fan
243
Removing the Rear Cover
243
Removing the Rear Cover
244
Removing the System Connector Cover
244
Removing the Main Controller Box Cover
244
Removing the Controller Fan
244
Chapter 5 Original Exposure System
247
Construction/Basic Sequence
249
Construction
253
Outline of the Original Exposure System(Ir105)
253
Outline
253
Major Components
254
Arrangement of Pcbs
255
Outline
255
Major Components
256
Arrangement of Pcbs
257
Basic Sequence
259
Basic Sequence of Operations
259
Book Mode, 1 Original, Copyboard Closed
259
Book Mode, 1 Original, Copyboard Cover Open
260
Various Control
262
Controlling the Scanner Drive System
262
Outline
262
Controlling the Scanner Motor
262
Preventing Overheating of the Scanner Motor
264
Outline
265
Controlling the Scanner Motor
265
Enlargement/Reduction
266
Changing the Reproduction Ratio in Main Scanning Direction
266
Enlargement/Reduction(Ir105)
266
Changing the Reproduction Ratio in Sub Scanning Direction
267
Changing the Reproduction Ratio in Main Scanning Direction
267
Controlling the Scanning Lamp
267
Outline
267
Stabilizing the Scanning Lamp(Ir105)
268
Controlling the Temperature by a Fluorescent Lamp Heater
268
Controlling Pre-Heat Voltage
269
Initial Activation
269
Detecting an Error
270
Outline
271
Scanning Lamp
271
Turning On/Off the Lamp
271
Detecting an Error
271
Detecting the Size of Originals
272
Outline
272
Detecting the State (Open/Closed) of the ADF
272
Outline
273
Points of Detection
273
Outline of Detection
274
Book Mode, 1 Original, Copyboard Cover Open
274
Book Mode, 1 Original, Copyboard Cover Close
275
Dirt Sensor Control
277
Detecting Dust in Stream Reading
277
Parts Replacement Procedure
279
Reader Unit
279
Removing the Reader Unit
279
Sliding the Reader Unit
279
CCD Unit
279
Removing the CCD Unit
279
Removing the CCD Unit
280
When Replacing the CCD Unit
281
When Replacing the CCD/AP Unit
281
Points to Note When Replacing the CCD Unit
282
Standard White Plate
282
Removing the Standard White Plate
282
When Replacing the Standard White Plate
283
Scanning Lamp
283
Remove the Scanning Lamp/Scanning Lamp Heater
283
Removing the Scanning Lamp
286
Points to Note When Replacing the Scanning Lamp
287
When Replacing the Scanning Lamp
287
After Replacing the Scanning Lamp
288
Reader Controller PCB
288
Removing the Reader Controller PCB
288
Removing the Reader Controller PCB Unit
288
When Replacing the Reader Controller PCB
289
Removing the Reader Controller PCB Unit
289
Points to Note When Replacing the Reader Controller PCB
289
Inverter PCB
289
Removing the Inverter PCB
289
Removing the Inverter PCB
290
Light Intensity Control PCB
291
Removing the Light Adjustment PCB
291
Removing the Transformer Unit
292
Removing the Transformer PCB
292
Removing the Transformer PCB(Ir105)
293
Original Orientation Detection PCB
293
Removing the Original Orientation Detection PCB
293
Fuse PCB
293
Removing the Fuse PCB
293
Scanner Motor
294
Removing the Scanner Motor
294
Mounting the Scanner Motor
295
Copyboard Cover Open/Close Sensor
295
Removing the Copyboard Cover Sensor
295
Original Size Sensor
295
Removing the Original Size Sensor 1/2
295
Removing the Original Size Sensor
296
Removing the Original Size Sensor 3/4
296
Scanner Home Position Sensor
297
Removing the HP Sensor
297
Removing the Scanner Home Position Sensor
297
Copyboard Glass Sensor
298
Removing the Copyboard Glass Sensor
298
Image Leading Edge Sensor
299
Removing the Image Leading Edge Sensor
299
Scanner Drive Cable
299
Adjusting the Tension of the Scanner Drive Cable
299
Removing the Scanner System Drive Cable
302
Removing the No. 1 Mirror Case Flexible Cable
302
Routing the Scanner Drive Cable
304
Positioning the No. 1/2 Mirror Base
305
Chapter 6 Image Processing System
307
Table of Contents
309
Outline
311
Outline of the Image Processing System
311
Analog Image Processing
312
Outline
312
Driving the CCD
313
Gain Correction and Offset Correction of the CCD Output
313
A/D Conversion of the CCD Output
313
4-Channel High-Speed Reading CCD
313
CCD Adjustment
314
Digital Image Processing
315
Outline
315
Detecting the Orientation of Originals
315
Shading Correction
315
Shading Correction
316
Auto Density Adjustment (AE)
317
Chapter 7 Laser Exposure
319
Table of Contents
321
Construction
323
Outline of the Laser Exposure System
323
Basic Sequence
325
Basic Sequence of Operations (Laser Exposure System)
325
Various Controls
326
Controlling the Laser Activation Timing
326
Flow of the BD Signal
326
Controlling the Intensity of Laser Light
326
Outline
326
Controlling Laser Activation
327
Controlling the Laser Intensity
328
Controlling the Laser Scanner Motor
329
Outline
329
Parts Replacement Procedure
331
Laser Scanner Unit
331
Removing the Laser Unit
331
Points to Note When Replacing the Laser Unit
333
BD Unit
333
Removing the BD Unit
333
Chapter 8 Image Formation
335
Table of Contents
337
Construction
341
Outline
341
Outline of the Image Formation System(Ir105)
341
Major Components
343
Pre-Transfer Exposure LED
344
Pre-Transfer Exposure LED
345
Addition of the Developing Fan(Ir105)
345
Basic Sequence
346
Potential Control
347
Outline
347
Basic Sequence
347
Potential Control
348
Basic Sequence
348
Grid Bias Corrective Control
349
Determining the Optimum Grid Bias
349
Determining the Optimum Laser Output
350
Laser Output Corrective Control
350
Determining the Optimum Developing Bias
351
Potential Control for Transparency Mode
351
Target Potential Correction in each Mode
352
Target Potential Correction in each Mode
354
Charging Mechanism
356
Primary Charging Mechanism
356
Outline
356
Primary Charging Assembly Cleaning Mechanism
356
Others
357
Dust-Collecting Roller Bias
357
Outline
357
Pre-Transfer Charging Mechanism
358
Outline
358
Controlling the Output to Suit the Environment (Fuzzy Control)
359
Pre-Transfer Charging Assembly Cleaning Mechanism
360
Others
360
Drum Cleaner Unit
362
Outline
362
Detecting the Waste Toner (Case Full Condition)
363
Developing Assembly
365
Controlling the Developing Assembly
365
Controlling the Toner Cartridge Drive Mechanism
366
Controlling the Developing Bias
367
Detecting the Toner Level and Controlling the Toner Supply Mechanism
368
Transfer Mechanism
371
Outline
371
Controlling the Output to Suit the Environment
371
Transfer Guide Bias
371
Transfer Charging Mechanism
372
Outline
372
Controlling the Output to Suit the Environment (Fuzzy Control)
372
Correcting the Output at the Trailing Edge of Paper
373
Transfer Charging Assembly Cleaning Mechanism
374
Others
375
Separation Mechanism
376
Separation Charging Mechanism
376
Outline
376
Correcting the Output to Suit the Environment and the Toner Deposit
376
Correcting the Output Upon Detection of Leakage
377
Others
378
Parts Replacement Procedure
379
Process Unit
379
Removing the Process Unit
379
Mounting the Process Unit
380
Pre-Exposure Lamp
381
Removing the Pre-Exposure Lamp Unit
381
Primary Charging Assembly
381
Removing the Primary Charging Assembly
381
Pre-Transfer Charging Assembly
382
Removing the Pre-Transfer Charging Assembly
382
Photosensitive Drum
382
Points to Note When Handling the Photosensitive Drum
382
Removing the Photosensitive Drum
382
Drum Cleaner Unit
384
Construction
384
Removing the Cleaning Blade
384
Mounting the Cleaning Blade
385
Removing the Blade Vibrating Unit
386
Photosensitive Drum Heater
386
Replacing the Photosensitive Drum Heater
386
Developing Assembly
387
Removing the Developing Assembly
387
Removing the Hopper
387
Developing Cylinder
387
Removing the Developing Cylinder
387
Developing Blade
389
Removing the Blade Unit
389
Mounting the Blade
389
Developing Cylinder Deceleration Clutch
389
Remove the Developing Cylinder Deceleration Clutch
389
Developing Cylinder Clutch
390
Remove the Developing Cylinder Clutch
390
Transfer/Separation Charging Assembly
391
Removing the Transfer/Separation Charging Assembly
391
Remove the Developing Cylinder Clutch
391
Pre-Transfer Exposure LED
392
Removing the Pre-Transfer Exposure LED
392
Separation Claw/Separation Claw Drive Assembly
393
Potential Sensor
393
Removing the Potential Sensor Unit
393
Dust-Collecting Roller
394
Removing the Dust-Collecting Roller
394
Charging Wire
394
Outline
394
Removing the Wire Cleaner for the Primary Charging Assembly
394
Stringing the Charging Wire
395
Stringing the Grid of the Primary Charging Assembly
396
Stringing the Charging Wire
396
Adjusting the Height of the Charging Wire
397
Chapter 9 Pickup/Feeding System
399
Advertisement
Canon ImageRunner iR8500 Series Service Manual (813 pages)
Brand:
Canon
| Category:
All in One Printer
| Size: 10.87 MB
Table of Contents
System Configuration
5
Cdrh Ordinances
8
Safety of Toner
13
Table of Contents
14
Error Code
24
Service Mode
24
Chapter 1 Introduction
25
Features
26
High-Speed, High-Quality Images
26
High Durability, High Reliability
26
High-Performance Controller, Large-Capacity Hard Disk for High-Level Processing
26
Ease of Use
26
Large Source of Paper
26
Various Delivery Handling (W/ Options)
27
High-Level Printing Functions Supporting Uses on a Network
27
Specifications
28
Copier
28
Chapter 2 New Function
28
Ir7200
28
Names of Parts
39
Using the Machine
47
Power Switch
47
Ir8500
47
Ir7200
48
Control Panel
49
Special Features
50
User Mode
51
New Functions
55
Stabilizing the Scanning Lamp
65
Detecting the State (Open/Closed) of the ADF
65
Detecting Dust in Stream Reading Mode
67
Disassembly/Assembly (Ir8500)
69
No. 1 Mirror Base Assembly
70
Scanner Drive Assembly
74
Pcbs
82
Others
88
Original Exposure System (Ir7200)
96
Outline
96
Arrangement of the Pcbs
99
Sequence of Operations (Original Exposure)
100
Book Mode, 1 Original, Copyboard Closed
100
Book Mode, 1 Original, Copyboard Cover Open
101
Enlargement/Reduction (Zoom)
102
Changing the Reproduction Ratio in Main Scanning Direction
102
Changing the Reproduction Ratio in Sub Scanning Direction
102
Scanner Drive System
103
Outline
103
Controlling the Scanner Motor
104
Controlling the Scanning Lamp (LA101)
106
Outline
106
Scanning Lamp
106
Turning On/Off the Lamp
106
Detecting an Error
107
Detecting the Size of Originals
108
Outline
108
Points of Detection
108
Outline of Detection
108
Disassembly/Assembly (Ir7200)
112
Removing the Reader Unit
113
Removing the Scanning Lamp
114
Points to Note When Replacing the Scanning Lamp
115
After Replacing the Scanning Lamp
116
Removing the Scanner Motor
116
Mounting the Scanner Motor
117
Removing the Scanner System Drive Cable
117
Routing the Scanner Drive Cable
120
Positioning the No. 1/2 Mirror Base
121
Removing the HP Sensor
123
Removing the Original Size Sensor
123
Removing the Copyboard Cover Sensor
124
Removing the Fuse PCB
125
Removing the Inverter
126
Outline of the Image Processing System (Ir8500)
128
Outline
128
4-Channels High-Speed CCD
130
CCD Adjustment
131
Analog Image Processing
132
Digital Image Processing
133
Detecting the Orientation of Originals
134
Disassembly/Assembly (Ir8500)
135
CCD Unit
136
Hard Disk
138
Image Processing System (Ir7200)
141
Outline
141
Analog Image Processing
142
Driving the CCD
142
Outline
142
A/D Conversion of the CCD Output
143
Gain Correction and Offset Correction of the CCD Output
143
Shading Correction
145
Auto Density Adjustment (AE)
146
Disassembly/Assembly (Ir7200)
149
CCD/Ap Pcb
150
Reader Controller PCB
151
Hard Disk
152
Laser Exposure System
155
Outline
155
Disassembly/Assembly
158
Reader Unit
159
Laser Unit
160
BD Unit
161
Image Formation System
163
Outline
163
Photosensitive Drum
166
Pre-Transfer Exposure LED (Addition)
166
Preventing Overheating of the Developing Unit
167
Development Fan
167
Revising the Developing Cylinder Cover
167
2-Speed Drive of the Developing Cylinder
169
Disassembly/Assembly
171
Process Unit
172
Charging Wires
177
Area Around the Process Unit
183
Pickup/Feeding System
186
Outline
186
System (Ir8500)
188
List of Changes Made to the Pickup/Feeding System (Ir7200)
188
Index Sheet Attachment
188
Disassembly/Assembly
189
Manual Feed Tray Assembly
190
Vertical Path Roller Assembly
194
Registration Feed Assembly
197
Duplexing Unit
198
Others
200
Fixing System
201
Outline
201
Controlling the Fixing Temperature
204
Transparency Mode
205
Thick Paper Mode
206
Power Save Mode
207
Error Detection
208
Down Sequence Control (100V)
209
Disassembly/Assembly
211
Fixing Heater and the Control Parts
212
Fixing Roller Assembly
218
Delivery Assembly
221
Paper Sensors
224
Externals/Auxiliary Controls
228
Changes Made to the Externals/Auxiliary Controls
228
Fans
229
Sequence of Operations (Fans)
231
Disassembly/Assembly
233
External Covers
234
Control Panel
246
Drive Assembly
260
Switches
264
Pcbs
266
Others
278
Main Power Switch
281
Side Paper Deck
282
Outline
282
Chapter 3 Main Controller
284
Basic Operation
285
Functional Construction
285
Outline of the Electrical Circuit
286
Hard Disk Drive
286
Main Controller PCB
286
Outline
286
Start-Up Sequence
288
Outline
288
Start-Up Sequence
289
Composition of the System Software
290
Inputs to and Outputs from the Major Pcbs
291
Wiring Diagram of the Major Pcbs
291
Digital Image Processing
292
Outline
292
Input Image Processing
293
Binary Processing (Error Diffusion Method; T-BIC)
293
Density Conversion (LUT)
293
Edge Emphasis
293
Editing
293
Enlargement/Reduction (Main Scanning Direction)
293
Image Data from the Reader Unit
293
Binary Processing (Dither Screen Method)
294
Controlling the Image Memory
294
Compression/Expansion, Rotation, and Enlargement/Reduction
294
Hdd
294
Sdram
294
Processing Output Image
294
Smoothing
294
Thickening (PDL Output Only)
294
Binary-Binary Density Conversion (Read Image Output Only)
295
Soft Counter
296
Controlling the Power Supply
298
Outline
298
Power Supply Mode
298
Standby Mode (Normal Operation)
298
Power Save Mode
298
Low-Power Mode
299
Shift from Standby Mode (Standby → Low-Power)
299
Shift to Standby Mode (Low-Power Mode → Standby)
299
Sleep Mode
299
Return to Standby Mode (Sleep → Standby)
299
Shift from Low Power Mode (Low-Power Mode → Sleep)
299
Shift from Standby Mode (Standby → Sleep)
299
Off Mode
300
Return to Standby Mode (off Mode → Standby)
300
Shift from Low-Power Mode (Low-Power → off Mode)
300
Shift from Standby Mode (Standby → off Mode)
300
Power Supply off Mode
300
Canon ImageRunner iR8500 Series Servise Manual (655 pages)
Brand:
Canon
| Category:
All in One Printer
| Size: 8.11 MB
Table of Contents
Cdrh Ordinances
7
Safety of Toner
11
Table of Contents
12
Chapter 1 Introduction
23
Features
24
High-Speed, High-Quality Images
24
High Durability, High Reliability
24
High-Performance Controller, Large-Capacity Hard Disk for High-Level Processing
24
Ease of Use
24
Large Source of Paper
24
Various Delivery Handling (W/ Accessories)
25
High-Level Printing Functions Supporting Uses on a Network
25
Specifications
26
External View
37
Names of Parts
37
Cross Section
39
Power Switch
41
Using the Machine
41
Special Features
43
User Mode
44
Chapter 2 New Function
48
Basic Construction
49
Functional Construction
49
Inputs to the Major Pcbs
50
Wiring of the Major Pcbs
50
New Functions
51
Original Exposure System
51
Enlargement/Reduction Method
53
Outline of the Original Exposure System
53
Preventing Overheating of the Scanner Motor
54
Arrangement of the Pcbs
55
Detecting the State
56
Stabilizing the Scanning Lamp
56
Detecting Dust in Stream Reading Mode
58
Outline of the Image Processing System
61
CCD
61
CCD Adjustment
63
Analog Image Processing
64
Digital Image Processing
65
Detecting the Orientation of Originals
66
Outline of the Laser Exposure System
67
Outline of the Image Formation System
69
Photosensitive Drum
70
Pre-Transfer Exposure LED
70
Preventing Overheating of the Developing Unit
72
Development Fan
72
Revising the Developing Cylinder Cover
72
2-Speed Drive of the Developing Cylinder
74
Pickup/Feed System
77
Feed System
77
Index Sheet Attachment
77
Outline of the Pickup/Feed System
77
Fixing System
79
System
81
Transparency Mode
82
Thick Paper Mode
83
Error Detection
85
Chapter 3 Main Controller
93
Basic Operation
94
Functional Construction
94
Outline of the Electrical Circuit
95
Hard Disk Drive
95
Main Controller PCB
95
Outline
95
Start-Up Sequence
97
Outline
97
Start-Up Sequence
98
Composition of the System Software
99
Inputs to and Outputs from the Major Pcbs
100
Wiring Diagram of the Major Pcbs
100
Digital Image Processing
101
Enlargement/Reduction
101
(Main Scanning Direction)
101
Edge Emphasis
102
Editing
102
Density Conversion (LUT)
102
Binary Processing (Error Diffusion Method; T-BASIC)
102
Binary Processing (Dither Screen Method)
103
Controlling the Image Memory
103
Compression/Expansion, Rotation, and Enlargement/Reduction
103
Hdd
103
Sdram
103
Processing Output Image
103
Smoothing
103
Thickening (PDL Output Only)
103
Binary-Binary Density Conversion (Read Image Output Only)
104
Soft Counter
105
Controlling the Power Supply
107
Outline
107
Power Supply Mode
107
Standby Mode (Normal Operation)
107
Power Save Mode
107
Low-Power Mode
108
Shift from Standby Mode (Standby ¡ Low-Power)
108
Shift to Standby Mode (Low-Power Mode ¡ Standby)
108
Sleep Mode
108
Off Mode
109
Chapter 4 Installation
110
Selecting the Site
111
Unpacking and Installation
114
Points to Note before Starting the Installation Work
114
Unpacking
115
Mounting the Scanner
120
Mounting the Fixing Assembly
121
Mounting the Charging Assemblies
124
Checking the Developing Assembly
128
Mounting the Pickup Assembly
130
Supplying Toner
132
Installing the Adf
134
Relocating the Machine
140
Chapter 5 Maintenance and Inspection
146
Periodically Replaced Parts
147
Guide to Durables
150
Copier
150
Side Paper Deck
154
Scheduled Servicing Work
155
Scheduled Service Chart
159
Work Procedure 1
162
Work Procedure 2
165
Mechanical System
169
No. 1 Mirror Base
169
Removing the Scanning Lamp/Scanning Lamp Heater
169
Points to Note When Replacing the Scanning Lamp
172
After Replacing the Scanning Lamp
172
Scanner Drive Assembly
173
Removing the Scanner Motor
173
Scanner Drive Cable
174
Pcbs
181
Removing the Light Control PCB
181
Removing the Inverter PCB
182
Others
184
Removing the Original Size Sensor (1/2)
184
Removing the Original Size Sensor
184
Removing the Scanner Home Position Sensor
186
Removing the Copyboard Glass Sensor
187
Removing the Image Leading Edge Sensor
188
Removing the Standard White Plate
189
After Replacing the Standard White Plate
190
Removing the CCD PCB
191
After Replacing the CCD Unit
193
Laser Unit
194
Removing the Laser Unit
194
After Replacing the Laser Unit
195
BD Unit
196
Removing the BD Unit
196
Components Around the Process Unit
197
Removing the Pre-Transfer Exposure LED
197
Removing the Developing Cylinder Decelerating Clutch
198
Removing the Developing Cylinder Clutch
199
Charging Wires
200
Outline
200
Removing the Wire Cleaner of the Primary Charging Assembly
200
Stringing the Charging Wires
201
Strutting the Grid Wire of the Primary Charging Assembly
204
Adjusting the Height of the Charging Wire
205
Process Unit
206
Removing the Process Unit
206
Mounting the Process Unit
208
Manual Feed Tray Assembly
210
Removing the Manual Feed Tray Unit
210
Removing the Manual Feed Tray Pickup Sensor
211
Attaching the Side Guide Timing Belt in the Manual Feed Tray Assembly
213
Vertical Path Roller Assembly
214
Removing the Vertical Path Roller 1/3/4
214
Removing the Vertical Path Roller 2
215
Registration Feeding Assembly
216
Removing the Registration Clutch
216
Removing the Registration Brake Clutch
217
Duplexing Unit
218
Removing the Reversal Motor
218
Removing the Lower Feed Motor
219
Fixing Assembly
220
Removing the Main/Sub Heater
220
Mounting the Main/Sub Heater
221
Removing the Thermal Switch
221
Removing the Main Thermistor
223
Removing the Sub Thermistor
225
Fixing Roller Assembly
226
Delivery Assembly
227
Removing the External Delivery Roller
227
Removing the Internal Delivery Roller
228
Removing the Delivery Speed Switching Clutch
229
Paper Sensor
230
Removing the Claw Jam Sensor
230
Removing the External Delivery Sensor
230
Removing the Internal Delivery Sensor
231
Removing the Reversal Sensor
232
Removing the Fixing/Feeding Unit Output Sensor
233
External Covers
234
Removing the
235
Removing the Inside Upper Cover
236
Removing the Fixing/Feeding Unit Cover
237
Removing the Rear Cover
237
Control Panel
239
Removing the Control Panel
239
Removing the Control Panel Controller (CPU) PCB and the Control Panel Inverter PCB
241
Removing the Control Panel PCB and the LCD Panel
242
Fans
244
Removing the Laser Driver Cooling Fan
244
Removing the Curl-Reducing Fan
246
Removing the Power Supply Cooling Fan 1
247
Removing the Power Supply Cooing Fan 2
248
Removing the Separation Fan
248
Developing Assembly Fan
250
System Fan
251
Delivery Anti-Adhesion Fan
252
Removing the Drum Drive Assembly
252
Removing the Cassette Pickup Drive Assembly
255
Switches
256
Removing the Cover Switch (Door Switch) Assembly
256
Removing the Manual Tray Switch Assembly
257
Pixel/Line Conversion
262
Main Controller PCB
262
After Replacing the Main Controller PCB
263
Reader Controller PCB
264
After Replacing the Reader Controller PCB
264
Original Orientation Detection PCB
264
AC Driver PCB
265
Voltage Converter PCB
265
High-Voltage Transformer (AC) PCB
266
All-Day Power Supply
266
Power Supply Unit
269
High-Voltage Transformer (AC)
270
High-Voltage Transformer (DC)
271
After Replacing the High-Voltage Transformer (DC)
271
Relay PCB
271
Removing the Voltage Converter Unit
272
Removing the Hard Disk
273
After Replacing the Hard
274
Making Image Adjustments
278
Standards and Adjustments
278
Adjusting the Position of the Scanner Mirror Base
287
Scanner System
287
When Replacing the Scanning Lamp When Replacing the Standard White Plate
287
Advertisement
Canon ImageRunner iR8500 Series Function Manual (167 pages)
Remote UI Guide
Brand:
Canon
| Category:
Copier
| Size: 6.08 MB
Table of Contents
Manuals for the Machine
4
Table of Contents
7
Preface
9
How to Use this Manual
9
Symbols Used in this Manual
9
Keys and Buttons Used in this Manual
10
Displays Used in this Manual
11
Abbreviations Used in this Manual
12
Legal Notices
13
Trademarks
13
Copyright
13
Disclaimers
14
Chapter 1 Using the Remote UI
15
Machines Covered in this Manual
16
Overview of the Remote UI
17
System Requirements
23
Before You Start the Remote UI
24
Setting the Remote UI to on
25
Starting the Remote UI
29
Models Not Equipped with MEAP
29
Models Equipped with MEAP
30
Chapter 2 Remote UI Functions
35
Device Status and Information Display
36
Job Management
38
Managing Print Jobs
39
Managing Copy, Send, and Fax Jobs
45
Managing Receive Jobs
50
Managing the Ir3300/2800/2200 Fax Send and Receive Jobs
54
Managing Inboxes
60
User Inboxes
62
Printing the Document
65
Memory RX Inbox
77
Confidential Fax Inboxes
82
Printing PDF or PS Files Directly (Direct Print)
87
Printing PDF Files Directly
88
Printing PS Files Directly
92
Managing the Address Book
94
Managing the Ir Address Book
95
Operating the Address Book
96
Operating the System Reference Address
106
Managing the Ir3300/2800/2200 Address Book
109
Customizing System Settings
115
Customizing System Information
115
Restarting the Machine
120
Specifying LDAP Server Settings
124
Specifying Forwarding Settings
128
Managing Department Ids
135
Import/Export Function
141
Saving Ir Address Lists in Files
142
Loading an Address Book
145
Saving Forwarding Settings in Files (Export)
148
Loading a Forwarding Settings File (Overwrite/Import)
150
Saving Additional Functions Settings in Files (Export)
152
Loading Additional Functions Settings Files (Overwrite/Import)
154
Saving an Ir3300/2800/2200 Address Book as a File (Export)
156
Loading an Ir3300/2800/2200 Address Book from a File
158
(Overwrite/Import)
158
Loading an Ir3300/2800/2200 Address Book from a File (Overwrite/Import)
158
Device Custom Settings
160
Canon ImageRunner iR8500 Series Service Manual (58 pages)
Brand:
Canon
| Category:
All in One Printer
| Size: 0.49 MB
Advertisement
Related Products
Canon iR 2570C
Canon IR3320i
Canon iR3225N
Canon iR5075
Canon iR2025
Canon iR1022F
Canon iR3045
Canon iR3025N
Canon iR7200 Series
Canon iR6020i
Canon Categories
Printer
Digital Camera
All in One Printer
Camcorder
Scanner
More Canon Manuals
Login
Sign In
OR
Sign in with Facebook
Sign in with Google
Upload manual
Upload from disk
Upload from URL