Sign In
Upload
Manuals
Brands
HP Manuals
Measuring Instruments
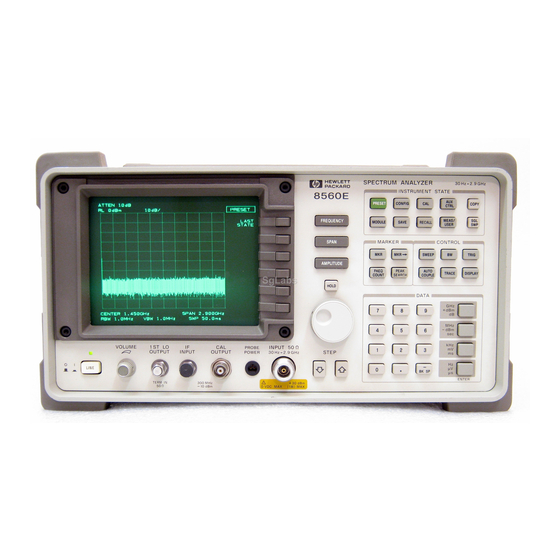
8560E
HP 8560E Manuals
Manuals and User Guides for HP 8560E. We have
1
HP 8560E manual available for free PDF download: Service Manual
HP 8560E Service Manual (665 pages)
Spectrum Analyzers
Brand:
HP
| Category:
Measuring Instruments
| Size: 10.5 MB
Table of Contents
Table of Contents
6
Figures
18
General Information
24
Introduction
25
Conventions Followed in this Guide
26
Documentation Outline
26
How to Use this Guide
26
Differences between HP 8560 EC-Series and E-Series Spectrum Analyzers
27
Instrument Variations
28
Table 1-1 Instrument Variations
28
Figure 1-1 Serial Number Label Example
30
Serial Numbers and Repair Information
30
Figure 1-2 Earlier Serial Number Label Example
31
HP 8529B Test and Adjustment Module
32
Service Kit
33
Table 1-2 Service Kit Contents
33
Recommended Test Equipment
34
Table 1-3 . Recommended Test Equipment
34
Electrostatic Discharge
42
Figure 1-3 Example of a Static-Safe Workstation
42
Reducing Potential for ESD Damage
43
Static-Safe Accessories
43
Table 1-4 . Static-Safe Accessories
43
Original Packaging
44
Other Packaging
44
Returning Instruments for Service
44
Service Tag
44
Figure 1-4 HP 8560E/EC Shipping Container and Cushioning Materials
46
Table 1-5 Static-Safe Accessories
46
Sales and Service Offices
47
Table 1-6 . Hewlett-Packard Sales and Service Offices
48
Adjustment Procedures
50
Introduction
51
Adjustable and Factory-Selected Components
52
Safety Considerations
52
Test Equipment
52
Which Adjustments Should be Performed
52
Adjustment Tools
53
Instrument Service Position
53
Table 2-1 Related Adjustments
53
Table 2-2 Adjustable Components
55
Table 2-3 Factory Selected Components
57
Adjustment Indicator
58
Test Equipment
58
Using the TAM
58
Table 2-4 . TAM Adjustments
59
Table 2-5 Required Test Equipment for TAM
60
Assembly Adjusted
61
Description
61
High Voltage Power Supply Adjustment (8560E Only)
61
Related Performance Test
61
Equipment
62
Figure 2-1 High Voltage Power Supply Adjustment Setup
62
Procedure
62
Assembly Adjusted
64
Description
64
Display Adjustment (8560E Only)
64
Equipment
64
Figure 2-2 Display Adjustment Setup
64
Related Performance Test
64
Cutoff Adjustment
65
Deflection Adjustments
65
Preliminary Adjustments
65
Procedure
65
Intensity Adjustments
66
Figure 2-3 CRT Adjust Pattern
67
Figure 2-4 A2 Display Adjustment Locations
68
Fast Zero Span Adjustments
69
Assembly Adjusted
71
Description
71
Figure 2-5 if Bandpass Adjustment Setup
71
IF Bandpass Adjustment
71
Related Performance Test
71
Equipment
72
Procedure
72
Table 2-6 . Factory-Selected LC Filter Capacitors
73
Table 2-7 . LC Factory-Selected Capacitor Selection
73
Table 2-8 . Factory-Selected XTAL Filter Capacitors
74
Table 2-10 . Capacitor Part Numbers
75
Table 2-9 XTAL Factory-Selected Capacitor Selection
75
Assembly Adjusted
76
Equipment
76
Figure 2-6 if Amplitude Adjustment Setup
76
IF Amplitude Adjustments
76
Related Performance Tests
76
A4 Log Amp/Cal Oscillator Amplitude Adjustment
77
Figure 2-7 if Amplitude Adjustment Locations
77
Procedure
78
A5 Adjustment Verification
79
A5 Reference Attenuator Adjustment
79
A4 Limiter Phase Adjustment
81
Assembly Adjusted
81
DC Log Amplifier Adjustments
81
Equipment
81
Related Performance Tests
81
A4 Linear Fidelity Adjustment
82
Procedure
82
A4 Log Fidelity Adjustment
83
Procedure
83
Assembly Adjusted
85
Description
85
Equipment
85
Figure 2-8 Sampler Adjustment Setup
85
Procedure
85
Related Performance Test
85
Sampling Oscillator Adjustment
85
Figure 2-9 TAM Connector Pin Locations
86
Sampler Match Adjustment
86
Sampling Oscillator Adjustment
86
Table 2-11 Sampling Adjustments
87
Assembly Adjusted
88
Description
88
Equipment
88
Figure 2-10 YTO Adjustment Setup
88
Related Performance Tests
88
YTO Adjustment
88
Procedure
89
YTO Main Coil Adjustments
89
Figure 2-11 YTO Adjustment Locations
91
YTO FM Coil Adjustments
91
Assembly Adjusted
92
Description
92
Equipment
92
Figure 2-12 First lo Distribution Amplifier Adjustment Setup
92
First lo Distribution Amplifier Adjustment
92
Related Performance Test
92
Figure 2-13 TAM Connector Pin Locations
93
Procedure
93
Assembly Adjusted
95
Description
95
Equipment
95
Related Performance Test
95
Tracking Generator Power Level Adjustments (Option 002)
95
Figure 2-14 Tracking Generator Power Setup and Adjustment Locations
96
Procedure
96
Assembly Adjusted
98
Description
98
Frequency Response Adjustment
98
Related Performance Tests
98
Equipment
99
Figure 2-15 Frequency Response Adjustment Setup
99
Procedure
100
Assembly Adjusted
102
Calibrator Amplitude Adjustment
102
Description
102
Equipment
102
Figure 2-16 Calibrator Amplitude Adjustment Setup
102
Related Performance Test
102
Procedure
103
Assembly Adjusted
104
Description
104
Figure 2-17 10 Mhz Frequency Reference Adjustment Setup
104
Mhz Reference Adjustment-TCXO (Option 103)
104
Related Performance Test
104
Equipment
105
Procedure
105
Assembly Adjusted
106
Demodulator Adjustment
106
Description
106
Figure 2-18 Demodulator Adjustment Setup
106
Related Performance Test
106
Equipment
107
Procedure
107
Figure 2-19 . Demodulator Adjustment Locations
108
Assembly Adjusted
109
Description
109
Equipment
109
External Mixer Bias Adjustment
109
Figure 2-20 External Mixer Bias Adjustment Setup
109
Related Performance Test
109
Procedure
110
Assembly Adjusted
111
Description
111
External Mixer Amplitude Adjustment
111
Figure 2-21 External Mixer Amplitude Adjustment Setup
111
Related Performance Test
111
Equipment
112
Procedure
112
Table 2-12 Conversion Loss Data
113
Assembly Adjusted
115
Description
115
Related Performance Test
115
Signal ID Oscillator Adjustment (Serial Prefix 3517A and Below)
115
Equipment
116
Figure 2-22 Signal ID Oscillator Adjustment Setup
116
Figure 2-23 Signal ID Oscillator Adjustment Jumper Location
117
Procedure
117
Assembly Adjusted
119
Description
119
Mhz Reference Adjustment-OCXO (Non-Option 103)
119
Related Performance Test
119
Equipment
120
Figure 2-24 10 Mhz Reference Adjustment Setup and Adjustment Location
120
Procedure
120
(Option 002)
123
18. Tracking Oscillator Adjustment
123
Assembly Adjusted
123
Description
123
Equipment
123
Related Performance Test
123
Figure 2-25 Tracking Oscillator Adjustment Setup
124
Procedure
124
Table 2-13 Tracking Oscillator Range Centering
126
Assembly Adjusted
127
Description
127
Mhz PLL Adjustment
127
Related Performance Tests
127
Equipment
128
Figure 2-26 16 Mhz PLL Adjustment Setup
128
Procedure
128
Figure 2-27 16 Mhz PLL Adjustment Location
129
Assembly Adjusted
131
Description
131
Equipment
131
Mhz Reference Adjustment (Serial Prefix 3406A and Above)
131
Procedure
131
Related Performance Test
131
2A. Adjustment Procedures: HP 3335A Source Not Available
132
What You'll Find in this Chapter
133
Required Test Equipment
134
Table 2A-1 . Recommended Test Equipment
134
4A. if Amplitude Adjustments
135
Assembly Adjusted
135
Equipment
135
Figure 2A-1 if Amplitude Adjustment Setup
135
Related Performance Tests
135
A4 Log Amp/Cal Oscillator Amplitude Adjustment
136
Figure 2A-2 if Amplitude Adjustment Locations
136
Procedure
137
A5 Adjustment Verification
138
A5 Reference Attenuator Adjustment
138
5A. DC Log Amplifier Adjustments
140
Assembly Adjusted
140
Equipment
140
Related Performance Tests
140
Figure 2A-3 if Amplitude Adjustment Setup
141
Figure 2A-4 if Amplitude Adjustment Locations
141
A4 Limiter Phase Adjustment
142
A4 Linear Fidelity Adjustment
142
Procedure
142
Procedure
143
A4 Log Fidelity Adjustment
144
Procedure
144
Assembly Replacement
146
Section 3
147
Introduction
147
Access to Internal Assemblies
148
Cable Color Code
149
Table 3-1 Required Tools
149
Figure 3-1 Hinged Assemblies
150
Procedure 1. Spectrum Analyzer Cover
150
Removal/Replacement
150
Procedure 2A. A1 Front Frame/A18 LCD (8560EC)
151
Removal of the Front Frame
151
Removal of the Display Driver Board, Inverter Board, and LCD
153
Removal of the Backlights
154
Removal of the Line Switch from the Front Panel
154
W3 Line Switch Cable (8560EC)
154
Figure 3-2 LCD Assembly - Exploded View
155
Removal of the Keyboard
156
Replacement of the Front Frame
156
Replacement of the Display Driver Board, Inverter Board, and LCD
158
Replacing the Backlights
159
Replacement of the Keyboard
160
Replacement of the Line Switch
160
Procedure 2B. A1 Front Frame/A18 CRT (8560E)
161
Removal
161
Figure 3-3 Discharging High Voltage on the CRT
163
Figure 3-4 A9, A18, and Line Switch Assembly Mounting Screws
164
Figure 3-5 Front Frame Mounting Screws
165
Figure 3-6 Installing the CRT and Front Frame Assemblies
166
Replacement
166
Figure 3-7 Placing the CRT into the Front Frame
167
Procedure 3. A1A1 Keyboard/Front Panel Keys
170
Removal
170
Replacement
170
Procedure 4. A1A2 RPG
171
Removal
171
Replacement
171
Procedure 5. A2, A3, A4, and A5 Assemblies
172
Removal
172
Figure 3-8 A2, A3, A4, and A5 Assembly Removal
173
Replacement
173
Figure 3-9 . Assembly Cables (1 of 3) − EC-Series
174
Figure 3-10 Assembly Cables (2 of 3) − EC-Series
175
Figure 3-11 Assembly Cables (3 of 3)− E-Series
175
Figure 3-12 Coaxial Cable Clip − EC-Series
176
Figure 3-13 Coaxial Cable Clip − E-Series
177
Figure 3-14 HP-IB and A1A1 W1 Cable Placement
178
Procedure 6A. A6 Power Supply Assembly (8560EC)
179
Removal
179
Figure 3-15 Power Supply Cover
180
Figure 3-16 Power Supply Cover
181
Figure 3-18 . Power Supply Cover
181
Replacement
181
Procedure 6B. A6 Power Supply Assembly (8560E)
182
Removal
182
Replacement
183
Figure 3-17 A6 Power Supply Connections
184
Procedure 7. A6A1 High Voltage Assembly (8560E Only)
186
Procedure 7. A6A1 High Voltage Assembly (8560E)
186
Removal
186
Figure 3-19 A17 CRT Driver Mounting Screws
188
Replacement
188
Procedure 8. A7 through A13 Assemblies
190
Figure 3-20 Assembly Locations
191
A7 1St lo Distribution Amplifier
192
Figure 3-21 RF Section Bias Connections
192
A8 Low Band Mixer
193
A9 Input Attenuator
193
Figure 3-22 A9 Mounting Screws at Right Frame
194
A10 Tracking Generator (Option 002)
195
Figure 3-23 A10 Tracking Generator Mounting Screws
195
A11 Yto
196
Figure 3-24 A11 Mounting Screws
196
A13 Second Converter
197
Figure 3-25 A14 and A15 Assembly Removal
198
Procedure 9. A14 and A15 Assemblies
198
Removal
198
Replacement
199
Figure 3-26 A14 and A15 Assembly Cables
200
Procedure 10. A16 FADC/A17 CRT Driver (8560E )
201
Procedure 10. A16 FADC/A17 CRT Driver (8560E)
201
Removal
201
Figure 3-27 A16 and A17 Mounting Screws
202
Replacement
202
Figure 3-28 A16 Cable Routing
203
Procedure 11. B1 Fan
204
Removal/Replacement
204
Procedure 12. BT1 Battery
205
Removal/Replacement
205
Procedure 13. Rear Frame/Rear Dress Panel
206
Removal
206
Figure 3-29 Main Deck Screws
208
Replacement
208
Figure 3-30 A6 Power Supply Cover
210
Procedure 14. W3 Line Switch Cable (8560E)
211
Removal
211
Figure 3-31 W3 Dress and Connection to A6 Power Supply
213
Figure 3-32 Line Switch Mounting Screw and Cable Dress
214
Figure 3-33 W3 Cable Connector
215
Replacement (Using Contact Removal Tool, HP Part Number 8710-1791)
216
Replacement (Without Contact Removal Tool)
217
Figure 3-34 Side Frame Mounting Screws
218
Procedure 15. EEROM (A2U501 or A2U500)
220
Procedure 15. EEROM (A2U501)
220
Removal/Replacement
220
Procedure 16. A21 OCXO (Non-Option 103)
222
Removal
222
Figure 3-35 A21 OCXO Mounting Screws
223
Replacement
223
Replaceable Parts
224
Figure 4-1 . Parts Identification, Assembly Mounting
225
Figure 4-2 . Parts Identification, Cover Assembly
225
Figure 4-3 . Parts Identification, Main Chassis (8560E)
225
Figure 4-4 . Parts Identification, RF Section
225
Figure 4-6 . Parts Identification, Rear Frame (8560E)
225
Figure 4-8 . Parts Identification, Front Frame (8560EC)
225
Figure 4-9 . Parts Identification, Rear Frame (8560EC)
225
Introduction
225
Table 4-1 . Reference Designations
225
Direct Mail-Order System
226
Direct Phone-Order System
226
Ordering Information
226
Parts List Format
227
Firmware-Dependent Part Numbers
228
Table 4-2 Abbreviations
230
Table 4-3 Reference Designations, Abbreviations, and Multipliers (4 of 4)
233
Table 4-4 Replaceable Parts
234
Table 4-5 Assembly Mounting (See Figure 4-1)
242
Table 4-6 Parts List, Cover Assembly (See Figure 4-2) − 8560E and 8560EC
243
Table 4-7 Parts List, Main Chassis − 8560EC (See Figure 4-8)
243
Table 4-8 . Parts List, Main Chassis (See Figure 4-3) − 8560E
244
Table 4-10 Parts List, Front Frame − 8560EC (See Figure 4-9)
246
Table 4-9 Parts List, RF Section − 8560E and 8560EC (See Figure 4-4)
246
Table 4-11 Parts List, Front Frame − 8560E (See Figure 4-5)
248
Table 4-12 Parts List, Rear Frame − 8560EC (See Figure 4-10)
248
Table 4-13 Parts List, Rear Frame − 8560E (See Figure 4-7)
249
Figure 4-5 . Parts Identification, Front Frame (1 of 2), 8560E
256
Figure 4-5 . Parts Identification, Front Frame (2 of 2), Option 002
258
Figure 4-7 . Parts Identification, Chassis (8560EC)
262
Section 4
269
Introduction
269
Figure 5-1 Hinged Assemblies
271
Figure 5-2 Top View (A2 and A3 Unfolded) − EC-Series
272
Figure 5-3 Top View (A2, A3, A4, and A5 Unfolded) − EC-Series
273
Figure 5-4 Top View (A2 Unfolded) − E-Series
274
Figure 5-5 Top View (A2 and A3 Unfolded) − E-Series
275
Figure 5-6 Top View (A2, A3, A4, and A5 Unfolded) − E-Series
276
Figure 5-7 Bottom View (A15 Unfolded)
277
Figure 5-8 Bottom View (A15 and A14 Unfolded)
278
Figure 5-9 Front End
279
Figure 5-10 Rear View EC-Series
280
Figure 5-11 Rear View E-Series
280
Assembly Level Text
283
Assembly Test Points
283
Block Diagrams
283
Introduction
283
Ribbon Cables
284
Figure 6-1 Assembly Test Points
285
Figure 6-2 Ribbon Cable Connections (1 of 3)
286
Figure 6-3 Ribbon Cable Connections (2 of 3)
287
Figure 6-4 Ribbon Cable Connections (3 of 3) - EC-Series Only
288
Service Cal Data Softkey Menus
289
Figure 6-5 Service Cal Data Menu
290
Troubleshooting to a Functional Section
291
A10 Tracking Generator (Option 002)
292
A11 Yto
292
A14 Frequency Control
292
A1A1 Keyboard
292
A2 Controller
292
A3 Interface
292
A4 Log Amplifier/Cal Oscillator
292
A6 Power Supply
292
A8 Low Band Mixer
292
Table 6-1 Location of Assembly Troubleshooting Text
292
Diagnostic Functions
293
TAM Requirements
293
Using the TAM
293
Inconsistent Results
294
Test Connectors
294
Automatic Fault Isolation
295
Blank Display (8560E Only)
295
Erroneous Results
295
Cal Oscillator Troubleshooting Mode
297
Manual Probe Troubleshooting
297
Error Messages
299
Error Message Elimination
300
Viewing Multiple Messages
300
(100 to 150)
301
ADC Errors (200 to 299)
302
LO and RF Hardware/Firmware Failures (300 to 399)
303
Automatic if Errors (400 to 599)
313
Digital and Checksum Errors (700 to 799)
325
System Errors (600 to 651)
325
Battery Problem (718)
327
Model Number Error (719)
327
System Errors (750 to 759)
327
Fast ADC Error (760)
328
Option Module Errors (800 to 899)
328
User-Generated Errors (900 to 999)
328
Block Diagram Description
330
Figure 6-6 Functional Sections
331
RF Section
332
Synthesizer Section
334
Table 6-2 Location of Assembly Troubleshooting Text
334
Figure 6-7 Phase Lock Loops
336
IF Section
336
Adc/Interface Section
338
Controller Section
340
Display/Power Supply Section
341
Figure 6-8 . Simplified Block Diagram
342
Figure 6-9 Overall Block Diagram (1 of 5)
344
Figure 6-9 Overall Block Diagram (2 of 5)
346
Figure 6-9 Overall Block Diagram (3 of 5)
348
Figure 6-9 Overall Block Diagram (4 of 5)
350
Figure 6-9 Overall Block Diagram (5 of 5)
352
Adc/Interface Section
354
Section 5
355
Introduction
355
Table
356
Table 7-1 W2 Control Cable Connections
356
Automatic Fault Isolation
358
Figure 7-1 A3 Test Connectors
358
Troubleshooting Using the TAM
358
Table 7-2 Automatic Fault Isolation References
359
Table 7-3 TAM Tests Versus A3 Test Connectors
360
Keyboard Interface
361
Keyboard/Rpg Problems
361
Table 7-4 . Keyboard Matrix
361
RPG Interface
362
Table 7-5 Counter Frequencies
363
Table 7-6 Trigger MUX Truth Table
364
Triggering or Video Gating Problems
364
Preselector Peaking Control (Real Time DAC)
367
Flatness Control (RF Gain Dacs)
368
A3 Assembly Video Circuits
370
Log Offset/Log Expand
372
Video Filter
373
Video MUX
373
Positive/Negative Peak Detectors
375
Table 7-7 A3U102 Latch Outputs
375
Video Filter Buffer Amplifier
375
Peak Detector Reset
377
Rosenfell Detector
378
Table 7-8 HMUX_SELO/1 Versus Detector Mode
378
Adc Mux
379
Table 7-9 Logic Levels at A3U108
380
Track and Hold
381
Variable Gain Amplifier (VGA)
381
A3 Assembly ADC Circuits
382
ADC Control Signals
382
ADC Start/Stop Control
383
Adc
384
Adc Asm
384
Ramp Counter
385
A3 Assembly Control Circuits
386
Analog Bus Drivers
386
Analog Bus Timing
387
Interface Strobe Select
388
Table 7-10 Demultiplexer A3U410 Truth Table
388
Table 7-11 Demultiplexer A3U500 Truth Table
389
A16 Assembly Fast ADC Circuits (Option 007 in the 8560E)
390
Video Input Scaling Amplifiers and Limiter
390
8-Bit Flash ADC
391
Peak/Pit Detection
392
32 K-Byte Static RAM
393
Table 7-12 LP/Q Truth Table
393
A16 Assembly Fast ADC Control Circuits
394
Table 7-13 Control Word at Primary Address (U3 and U4)
395
Clock and Sample Rate Generator
398
Reference Clock
398
Figure 7-2 A3 Interface Assembly Block Diagram
402
Figure 7-3 Fast ADC Block Diagram (Option 007 in E-Series Instruments)
404
Section 6
407
Figure 8-1 A4 and A5 Test Connectors
409
Table 8-1 Automatic Fault Isolation References
409
Troubleshooting Using the TAM
409
Troubleshooting A5 with the TAM
410
Troubleshooting the Log Amplifier with the TAM
410
Table 8-2 TAM Tests Versus Test Connectors
411
Table 9-1 . TAM Tests Versus Test Connectors
411
Figure 8-2 if Section Troubleshooting with the TAM
413
Troubleshooting the Cal Oscillator with the TAM
414
Table 8-3 Sweep Width Settings
415
Automatic if Adjustment
416
Parameters Adjusted
417
Requirements
418
IF Gain Uncertainty Performance Test
420
Performance Test Failures
420
Resolution Bandwidths Performance Tests
421
Scale Fidelity Performance Test
421
Log Amplifier
422
Log Amplifier Assembly (P/O A4)
422
Linear Amplifiers
423
Table 8-4 if Gain Application Guidelines (ATTEN=10 Db)
424
Video Offset
424
Video Output
425
AM/FM Demodulator
426
Frequency Counter Prescaler/Conditioner
426
10.7 Mhz if Filters
427
4.8 Khz if Filters
427
4.8 Khz and 10.7 Mhz if Filters
428
10.6952 Mhz VCXO
429
Input Switch
429
LO Switch
429
Limiter
430
Synchronous Detector
430
Detector/Mixer
431
Isolation Amplifier
431
Log Gain Compensation
431
Log Offset Compensation
431
Log Offset/Gain Compensation
431
Video MUX
432
A5 if Assembly
433
IF Signature
434
Figure 8-3 if Adjust Signature
436
Figure 8-4 . Detailed if Adjust Signature (1)
437
Figure 8-5 . Detailed if Adjust Signature (2)
438
Figure 8-6 . Detailed if Adjust Signature (3)
439
Figure 8-7 . Detailed if Adjust Signature (4)
440
Figure 8-8 . Detailed if Adjust Signature (5)
441
Common if Signature Problems
442
Figure 8-9 Noisy Signature
443
Figure 8-10 Noise with Correct Shape
444
Figure 8-11 Region B Amplitude Variation
445
Figure 8-12 . Region B Amplitude Offset
446
Mhz Resolution Bandwidth Problems
446
Figure 8-13 Faulty Crystal Short
447
30 Khz Resolution Bandwidth Problems
448
Figure 8-14 Faulty LC Pole
448
Figure 8-15 Faulty Crystal Symmetry
449
Khz and 10 Khz Resolution Bandwidth Problems
449
Step Gains
450
Cal Oscillator Assembly (P/O A4)
451
Cal Oscillator Unlock at Beginning of if Adjust
452
Inadequate CAL OSC AMPTD Range
453
300 Hz to 3 Khz Resolution Bandwidth out of Specification
454
Figure 8-16 Output Waveform, 10 Khz Resolution Bandwidth
456
Figure 8-17 Output Waveform, 3 Khz Resolution Bandwidth
457
Figure 8-18 Output Waveform, 1 Khz Resolution Bandwidth
458
Figure 8-19 Output Waveform, 300 Hz Resolution Bandwidth
459
Figure 8-20 Failed Crystal Set Symptoms
460
Figure 8-21 . A4 Log Amplifier/Cal Oscillator Block Diagram (1 of 2)
464
Figure 8-21 . A4 Log Amplifier/Cal Oscillator Block Diagram (2 of 2)
466
Figure 8-22 A5 if Assembly Block Diagram
468
Section 7
471
Blank Display (8560E)
472
Troubleshooting Using the TAM (8560E)
472
Figure 9-1 A2 Test Connectors
473
Digital Signature Analysis −DSA (8560E)
475
Display Problems (8560E)
476
Line Generators
476
Blanking
477
Figure 9-2 Line Generator Output Waveforms
477
Figure 9-3 Blanking Waveforms
478
Display Jumbled or Trace off Screen
479
Figure 9-4 Expanded Blanking Waveforms
479
Figure 9-5 Switch Driver Waveform LCHAR
480
Figure 9-6 Distorted X/Y Line Generator Waveforms
482
Figure 9-7 Expanded X/Y Line Generator Waveforms
482
Figure 9-8 Normal X/Y Line Generator Waveforms
483
Intensity
483
Bad Characters or Graticule
484
Long Lines Dimmer than Short Lines
484
Figure 9-9 Delta X Waveform
485
Figure 9-10 Delta y Waveform
486
Analog Zero-Span Problems (8560E)
487
Figure 9-11 . DEF1 Synchronization
487
Frequency-Count Marker Problems
488
Frequency Counter
490
Table 9-2 Gate Times
491
Table 9-3 Gate Times
493
State- and Trace-Storage Problems
500
Keyboard Problems
501
Figure 9-12 A2 Controller Block Diagram (E-Series)
502
Figure 9-13 A2 Controller Block Diagram (EC-Series)
504
Section 8
507
Synthesizer Troubleshooting Section
509
Table 10-1 Center Frequency Tuning Values
510
Figure 10-1 YTO Loop Test Setup
512
Figure 10-2 Sampler and Sampling Oscillator Test Setup
513
Table 10-2 Sampling Oscillator Test Frequencies
514
Test Setup Troubleshooting
515
Figure 10-3 A14 and A15 Test Connectors
516
Troubleshooting Using the TAM
516
Figure 10-4 TAM Connector Pin Locations
517
Table 10-3 Measured Signal Line Location
517
Table 10-4 Automatic Fault Isolation References
517
Table 10-5 TAM Tests Versus Test Connectors
520
Table 10-6 . TAM Tests Versus Test Connectors
520
General PLL Troubleshooting
521
PLL Locked at Wrong Frequency
521
Figure 10-5 PLL Locked at Wrong Frequency
522
Unlocked PLL
522
Figure 10-6 Unlocked PLL
523
Operation (100 Mhz VCXO)
525
Troubleshooting (100 Mhz VCXO)
525
Unlocked Reference PLL (100 Mhz VCXO)
525
Third lo Driver Amplifier (100 Mhz VCXO)
529
Operation (600 Mhz SAWR)
530
Troubleshooting (600 Mhz SAWR)
530
Unlocked Reference PLL (600 Mhz SAWR)
530
Third lo Driver Amplifier (600 Mhz SAWR)
534
Operation
535
Troubleshooting
535
Unlocked Offset Lock Loop (Sampling Oscillator)
535
Table 10-7 Sampling Oscillator PLL Divide Numbers
536
Operation
539
Unlocked YTO PLL
539
Table 10-8 . Amplifier Polarities
540
Troubleshooting an Unlocked YTO PLL
541
Figure 10-7 Troubleshooting an Unlocked YTO PLL
542
Table 10-9 Voltages in FM Coil and Main Loop Drivers
546
Table 10-10 Main Coil Coarse and Fine Dacs Voltages
547
Confirming an Unlocked Condition
548
Operation
548
Unlocked Fractional N PLL
548
Fractional N PLL
549
Table 10-11 Postscaler Divide Numbers
549
Table 10-12 Unlocked Fractional N Troubleshooting Areas (08560-60069 and Above)
550
Table 10-13 . Unlocked Fractional N Troubleshooting Areas (08560-60062 and Below)
550
Figure 10-8 VCO Bias Voltages for A14 Assemblies 08560-60069 and above
552
Figure 10-8A . VCO Bias Voltages for A14 Boards(08560-60062 and Below)
553
Table 10-14 Divider and Integrator Troubleshooting
554
Determining the First lo Span
556
Frequency Span Accuracy Problems
556
Table 10-15 Sweep Signal Destination Versus Span
556
Confirming Span Problems
557
Table 10-16 Harmonic Mixing Number Versus Center Frequency
557
YTO Main Coil Span Problems (lo Spans >20 Mhz)
557
YTO FM Coil Span Problems (lo Spans 2.01 Mhz to 20 Mhz)
558
Table 10-17 Settings of Sweep Switches
559
First lo Span Problems (All Spans)
560
Fractional N Span Problems (lo Spans ≤2 Mhz)
560
Phase Noise in Locked Versus Lock-And-Roll Spans
562
Phase Noise Problems
562
Table 10-18 Settings of Sweep Switches
562
Fractional N PLL Phase Noise
563
Fractional N Versus Offset PLL or YTO PLL Phase Noise
563
Reference Versus Reference PLL Phase Noise
563
Sampler and Sampler if
564
Sweep Generator Circuit
566
Figure 10-9 . Simplified Sweep Generator
567
Figure 10-10 . Simplified Sweep Generator During Retrace
568
Figure 10-11 . Simplified Synthesizer Section
571
Figure 10-12 . Simplified A14 Assembly Block Diagram
572
Figure 10-13 . Simplified A15 Assembly Block Diagram (100 Mhz PLL)
573
Figure 10-13A . Simplified A15 Assembly Block Diagram (600 Mhz PLL)
574
A21 Ocxo
575
Figure 10-14 Frequency Control Block Diagram
576
Figure 10-15 RF Block Diagram (for A15 08563-60054, 08563-60055, or 08563-60056)
578
Figure 10-16 . RF Block Diagram (for A15 <08563-60054, 08563-60055, or 08563-60056)
580
Section 9
583
Figure 11-1 A14 and A15 Test Connectors
585
Table 11-1 Automatic Fault Isolation References
585
Troubleshooting Using the TAM
585
Table 11-2 TAM Tests Versus Test Connectors
586
Low Band Problems (30 Hz to 2.9 Ghz)
588
Low Band Problems
589
A7 LODA (lo Distribution Amplifier)
590
A8 Low Band Mixer
592
A9 Input Attenuator
593
Table 11-3 Attenuator Pin Values
594
A13 Second Converter
595
A14 Frequency Control Assembly
597
A7 LODA Drive
597
Figure 11-2 A7 LODA Drive
598
A15 RF Assembly
599
Confirming a Faulty Third Converter
599
Confirming a Third Converter Output
599
Third Converter
600
Flatness Compensation Control
601
Control Latches
602
SIG ID Oscillator (Option 008)
603
10 Mhz Reference
604
Figure 11-3 10 Mhz Reference at A15J302
605
Figure 11-4 . 10 Mhz TTL Reference at U304 Pin 13
606
Table 11-4 RF Section Mnemonic Table
607
A10 Tracking Generator (Option 002)
608
Block Diagram Description
608
Output Goes Unleveled (ERR 900 or ERR 901)
609
Excessive Residual FM
611
Flatness Out-Of-Tolerance
611
Vernier Accuracy Out-Of-Tolerance
612
Harmonic/Spurious Outputs too High
613
No Power Output
614
Power Sweep Not Functioning Properly
614
Figure 11-5 . HP 8560E RF Section Troubleshooting Block Diagram
616
Figure 12-1 . Simplified Section Block Diagram
621
Figure 12-2 Probe Power Socket
622
Figure 12-6 . Probe Power Socket
622
Figure 12-3 Location of +5V Supply Pins on J1 of A17 and J8 of A2
624
Figure 12-4 Power Supply and CRT Block Diagram
626
Table 12-1 Automatic Fault Isolation References
627
Figure 12-5 A17 Test Connector
628
Table 12-2 TAM Tests Versus Test Connectors
628
Power Supply
639
Figure
640
Figure 12-7 . Simplified Power Supply Block Diagram
640
Power Supply
640
Table
641
Table 12-3 W1 Power-Cable Connections
641
Table 12-4 Automatic Fault Isolation References
642
A6 Power Supply Assembly
643
Dead Power Supply
643
Figure 12-8 Buck Regulator Waveform
644
Line Fuse Blowing
645
Low Voltage Supplies
645
Supply Restarting Every 1.5 Seconds (Kick Start)
645
High Voltage Supplies (8560E Only)
646
CRT Supply Dropping out (8560E Only)
647
Blanking Signal (8560E Only)
648
Buck Regulator Control
648
DC-DC Converter Control
649
Power up
649
Figure 12-9 A17 CRT Driver Block Diagram
650
Figure 12-10 A6 Power Supply Block Diagram
652
Table 13-1 . Clips Available for HP 8560E and 8560EC Spectrum Analyzers
656
Figure 13-1 HP 8560 EC-Series Interconnect Block Diagram
659
Figure 13-2 HP 8560 E-Series Interconnect Block Diagram
661
Advertisement
Advertisement
Related Products
HP 8560A
HP 8568B
HP HP 8566B
HP 85662A
HP 8562E
HP 8560EC
HP 85688
HP 8565A
HP 8510C
HP 85325A
HP Categories
Desktop
Laptop
Server
Monitor
Switch
More HP Manuals
Login
Sign In
OR
Sign in with Facebook
Sign in with Google
Upload manual
Upload from disk
Upload from URL