Sign In
Upload
Manuals
Brands
Huawei Manuals
Air Conditioner
NetCol8000-C070
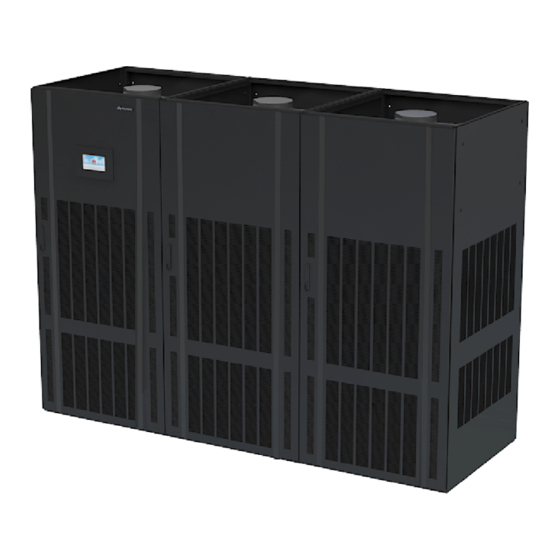
Huawei NetCol8000-C070 Manuals
Manuals and User Guides for Huawei NetCol8000-C070. We have
6
Huawei NetCol8000-C070 manuals available for free PDF download: User Manual, Quick Manual
Huawei NetCol8000-C070 User Manual (254 pages)
In-room Chilled Water Smart Cooling Product
Brand:
Huawei
| Category:
Accessories
| Size: 22.46 MB
Table of Contents
About this Document
3
Table of Contents
6
Safety Information
11
General Safety
11
Personnel Requirements
14
Electrical Safety
14
Installation Environment Requirements
16
Mechanical Safety
18
Cooling System Safety
20
Others
21
Product Description
22
Model Number Description
22
Technical Specifications
23
Components
25
Appearance
25
Interior
28
Display Module
34
Main Control Module
37
Monitoring System
39
Installation
40
Installation Requirements
40
Upflow Layout Requirements
40
Downflow Layout Requirements
41
Pipe Layout Requirements
41
Installation Requirements
44
Installation Preparations
45
Tools
45
Material Preparations
48
Water Inlet Pipe of the Wet Film Humidifier
48
Drainpipe
49
Chilled Water Inlet and Outlet Pipes
49
Pipe Support Preparations
50
Cables
50
Unpacking and Acceptance
53
Installing Components
53
Checking the Nitrogen Pressure
53
Exhausting Nitrogen
55
Removing the Pallet
56
Securing Equipment
57
Lowering a Fan (Applicable to Downflow Units)
58
Connecting Pipelines
60
Cabinet Hole Positions
61
Installing the Chilled Water Pipe
62
Upflow
63
Downflow
65
Optional) Installing Pipes for the External Water Valve Actuator
66
Installing the Drainpipe
67
Optional) Installing the Water Inlet Pipe for the Wet Film Humidifier
68
Optional) Leakage Test with Nitrogen
69
Leakage Test with Water
70
Installing Cables
72
Positions of Electric Ports
72
Installing Power Cables
74
Installing Signal Cables
76
Optional) Installing Teamwork and Monitoring Communications Cables
78
Preparing a Network Cable
78
Independent Networking Scenario
79
CAN Teamwork + RS485 Monitoring
79
CAN Teamwork + FE Monitoring
80
Optional) Installing Cables for the External Water Valve Actuator
81
Optional) Installing a Gravity Damper (Only for an Upflow Unit)
83
Optional) Installing a Motorized Damper (Only for a Downflow Unit)
83
Optional) Installing T/H Sensors Outside a Cabinet and Cables
86
Optional) Installing the Direct Free-Cooling Plenum
89
Optional) Installing a Differential Pressure Sensor
89
Optional) Installing an Upflow Differential Pressure Sensor
89
Optional) Installing a Downflow Differential Pressure Sensor
91
Optional) Installing a Cap (Applicable to Upflow Units)
93
Installation Verification
96
Power-On Commissioning
100
Power-On Preparations
100
Power-On
101
Home Screen
107
Menu Function Description
109
Setting Parameters
110
Setting T/H Sensor Parameters
110
Optional) Setting the Pressure Difference Control
112
Setting Teamwork Control Parameters
113
Setting Communications Parameters
119
Setting Access Control Parameters
119
Setting Communications Parameters (Modbus RTU Protocol)
120
Setting Communications Parameters (Modbus TCP Protocol)
120
Setting Communications Parameters (SNMP Protocol)
122
Optional) Setting WIFI Parameters
125
Correlation Relationship of Parameters
126
Startup
127
Wizard Startup
132
Optional) Power-Off
135
Optional) Antifreezing
136
Checking after Commissioning
138
WEB Introduction
139
Preparations and Webui Login
139
Webui Description
142
Maintenance
144
Routine Maintenance
144
Monthly Maintenance
145
Semi-Annual Maintenance Items
146
Annual Maintenance
148
Alarm Reference
148
Troubleshooting
169
Parts Replacement
172
Replacing a Fan
173
Replacing a Fan (Upflow)
173
Replacing a Fan (Downflow)
178
Replacing an Air Filter
181
Replacing an Air Filter (Upflow)
181
Replacing an Air Filter (Downflow)
182
Replacing an Electric Heater
182
Replacing an Electric Heater (Upflow)
183
Replacing an Electric Heater (for a Downflow Model)
184
Replacing a Display Module
186
Replacing a Differential Pressure Switch
186
Replacing a Wet Film Humidifier
188
Replacing a Wet Film Humidifier (for an Upflow Model)
188
Replacing a Wet Film Humidifier (for a Downflow Model)
189
Replacing a Built-In Water Valve Actuator
191
Replacing a PSU
194
Replacing an Inlet Solenoid Valve
196
Replacing a T/H Sensor
197
Faq
199
How Do I Issue a Start/Shutdown Command
199
How Do I Query the Setting of a Parameter before Change
200
Operations with a USB Flash Drive
201
How Do I Export Data
202
How Do I Import and Export a Configuration File
203
How Do I Import a Certificate and Key
204
Display Module Screen Operations
205
How Do I Set LAN Parameters
205
How Do I Check Temperature and Humidity Curves
206
How to Query Logs
206
How Do I View Component Status
207
How Do I View System Parameters
207
How to Query Version Details
207
How to View Teamwork Control Information
208
How Do I Mute the Buzzer
208
How Can I Handle Active Alarms
208
How Do I Clear Component Runtime
210
How to Calibrate a Sensor
210
How Do I Change the Password
210
How to Set Alarm Parameters
211
How to Commission Single Component
212
How Do I Handle an E-Label Identification Problem
213
Webui Operations
214
How Do I Manage Webui Users
215
How Do I Install a Network Security Certificate
217
How Do I View Active Alarms and Historical Alarms
217
How Do I Export or Import a Configuration File
218
How Do I Export Fault Information
218
How Do I Change an IP Address
219
How Do I View Version Information
219
A Glycol Adding Requirements
220
B Physical Ports
221
Netcol8000-C070U
221
Netcol8000-C130U
222
Netcol8000-C190U
223
Netcol8000-C070D
223
Netcol8000-C130D
224
Netcol8000-C190D
226
C Base Dimensions
227
Netcol8000-C070U
227
Netcol8000-C130U
228
Netcol8000-C190U
229
Netcol8000-C070D
230
Netcol8000-C130D
231
Netcol8000-C190D
232
D Electrical Diagrams
233
Netcol8000-C130D with an External Water Valve Actuator
235
E Parameter Description
237
F Acronyms and Abbreviations
253
Advertisement
Huawei NetCol8000-C070 User Manual (221 pages)
Brand:
Huawei
| Category:
Chiller
| Size: 21.91 MB
Table of Contents
About this Document
3
Table of Contents
6
Safety Information
11
Personal Safety
12
Electrical Safety
14
Environmental Requirements
18
Mechanical Safety
20
Cooling System Safety
26
Product Description
27
Model Number Description
27
Technical Specifications
28
Components
30
Appearance
31
Interior
33
Display Module
39
Main Control Module
42
Monitoring System
44
Installation
45
Installation Requirements
45
Layout Requirements (Upflow)
45
Layout Requirements (Downflow)
46
Layout Principles
46
System Requirements
49
Installation Preparations
50
Tools
50
Materials
55
Water Inlet Pipe of the Wet Film Humidifier
55
Drainpipe
56
Chilled Water Inlet and Outlet Pipes
56
Pipe Support
57
Cables
57
Unpacking and Acceptance
59
Installing Components
60
Checking the Nitrogen Pressure
60
Exhausting Nitrogen
62
Removing the Pallet
63
Securing Equipment
64
Lowering a Fan (Applicable to Downflow Units)
65
Connecting Pipelines
67
Cabinet Hole Positions
68
Installing the Chilled Water Pipes
69
Upflow
70
Downflow
71
Optional) Installing Pipes for the External Water Valve Actuator
72
Installing the Drainpipe
73
Optional) Installing the Water Inlet Pipe for the Wet Film Humidifier
74
Optional) Leakage Test with Nitrogen
75
Leakage Test with Water
76
Installing Cables
78
Positions of Electric Ports
78
Installing Power Cables
80
Installing Signal Cables
82
Optional) Installing Teamwork and Monitoring Communications Cables
84
Preparing a Network Cable
84
Independent Networking
85
FE Teamwork + FE Monitoring
85
FE Teamwork + RS485 Monitoring
86
CAN Teamwork + FE Monitoring
88
CAN Teamwork + RS485 Monitoring
89
Optional) Installing Cables for the External Water Valve Actuator
90
Optional) Installing a Gravity Damper (Only for an Upflow Unit)
92
Optional) Installing a Motorized Damper (Only for a Downflow Unit)
92
Optional) Installing T/H Sensors Outside a Cabinet and Cables
95
Optional) Installing the Direct Free-Cooling Plenum
98
Optional) Installing a Differential Pressure Sensor
98
Optional) Installing an Upflow Differential Pressure Sensor
98
Optional) Installing a Downflow Differential Pressure Sensor
100
Optional) Installing a Cap (Applicable to Upflow Units)
101
Installation Verification
104
Power-On Commissioning
107
Power-On Preparations
107
Power-On
108
Home Screen
114
Menu Function Description
116
Setting Parameters
116
Setting T/H Sensor Parameters
117
Optional) Setting the Pressure Difference Control
119
Optional) Setting Teamwork Parameters
120
Setting Communications Parameters
126
Setting Access Control Parameters
126
Setting Communications Parameters (RTU Protocol)
127
Setting Communications Parameters (Modbus TCP Protocol)
128
Setting Communications Parameters (SNMP Protocol)
130
Optional) Setting WIFI Parameters
132
Correlation Relationship of Parameters
133
Startup
135
Wizard Startup
137
Power-Off
140
Optional) Antifreezing
141
Checking after Commissioning
142
Webui
144
Preparations and Webui Login
144
Webui Description
146
Maintenance
148
Routine Maintenance
148
Monthly Maintenance
149
Semi-Annual Maintenance
150
Annual Maintenance
152
Alarm Reference
152
Troubleshooting
152
Parts Replacement
155
Replacing a Fan
156
Replacing a Fan (Upflow)
156
Replacing a Fan (Downflow)
161
Replacing an Air Filter
164
Replacing an Air Filter (Upflow)
164
Replacing an Air Filter (Downflow)
165
Replacing an Electric Heater
165
Replacing an Electric Heater (Upflow)
166
Replacing an Electric Heater (for a Downflow Model)
167
Replacing a Display Module
169
Replacing a Differential Pressure Switch
169
Replacing a Wet Film Humidifier
171
Replacing a Wet Film Humidifier (for an Upflow Model)
171
Replacing a Wet Film Humidifier (for a Downflow Model)
172
Replacing a Built-In Water Valve Actuator
174
Replacing a PSU
177
Replacing an Inlet Solenoid Valve
179
Replacing a T/H Sensor
180
Faq
182
How Do I Issue a Start/Shutdown Command
182
How Do I Query the Setting of a Parameter before Change
184
Operations with a USB Flash Drive
184
How Do I Export Data
185
How Do I Export or Import a Configuration File
186
How Do I Import a Certificate and Key
187
Display Module Screen Operations
188
How Do I Set LAN Parameters
188
How Do I Check Temperature and Humidity Curves
189
How Do I Query Logs
190
How Do I View Component Status
190
How Do I View System Parameters
191
How to Query Version Details
191
How to View Teamwork Control Information
191
How Do I Mute the Buzzer
191
How Do I Handle Active Alarms
192
How Do I Clear Component Runtime
193
How to Calibrate a Sensor
193
How Do I Change the Password
194
How Do I Set Alarm Parameters
194
How to Commission Single Component
195
How Do I Handle an E-Label Identification Problem
196
Webui Operations
197
How Do I Manage Webui Users
198
How Do I Install a Network Security Certificate
200
How Do I View Active Alarms and Historical Alarms
200
How Do I Export or Import a Configuration File
201
How Do I Export Fault Information
201
How Do I Change an IP Address
202
How Do I View Version Information
202
A Glycol Adding Requirements
203
B Physical Ports
204
Netcol8000-C070U
204
Netcol8000-C130U
205
Netcol8000-C190U
206
Netcol8000-C070D
207
Netcol8000-C130D
208
Netcol8000-C190D
209
C Base Drawings
210
Netcol8000-C070U
210
Netcol8000-C130U
211
Netcol8000-C190U
212
Netcol8000-C070D
213
Netcol8000-C130D
214
Netcol8000-C190D
215
D Electrical Diagrams
216
E Acronyms and Abbreviations
220
Huawei NetCol8000-C070 User Manual (236 pages)
In-room Chilled Water Smart Cooling Product
Brand:
Huawei
| Category:
Air Conditioner
| Size: 32.36 MB
Table of Contents
About this Document
3
Table of Contents
5
1 Safety Information
9
General Safety
9
Personnel Requirements
12
Electrical Safety
12
Installation Environment Requirements
14
Mechanical Safety
15
Cooling System Safety
18
Others
19
2 Product Overview
20
Model Description
20
Appearance and Components
20
Controller
28
Monitoring System
30
Operating Conditions
30
Technical Specifications
32
3 Installation Guide
34
Installation Precautions
34
Precautions
34
Tools
37
Material Preparations
39
Water Inlet Pipe of the Wet Film Humidifier
39
Drainpipe
39
Chilled Water Inlet and Outlet Pipes
40
Pipe Support Preparations
40
Cables
41
System Layout Diagram
44
Upflow
44
Downflow
45
Transportation and Unpacking
46
Removing the Packing
46
Checking Fittings
46
Installing the Equipment
46
Checking the Nitrogen Pressure
46
Exhausting Nitrogen
48
Removing the Pallet
50
Securing Equipment
50
Lowering a Fan (Applicable to Downflow Units)
51
Connecting Pipelines
53
Cabinet Hole Positions
54
Holes in the Side Panel of an Upflow Unit
54
Holes at the Bottom of a Downflow Unit
54
Connecting the Chilled Water Pipe
55
Upflow
56
Downflow
58
Connecting Water Pipes
59
Connecting the Drainpipe
59
Optional) Connecting the Water Inlet Pipe for the Wet Film Humidifier
60
Optional) Leakage Test with Nitrogen
61
Leakage Test with Water
62
Cable Connections
63
Precautions
63
Positions of Electric Ports
64
Connecting Power Cables
66
Connecting Signal Cables
68
Teamwork Networking and Monitoring
70
Main Control Module
70
Connecting the Teamwork Network Cable
71
Connecting the Monitoring Network Cable
71
Optional) Connecting the Gravity Damper (Applicable to Upflow Units)
74
Optional) Connecting the Motorized Damper (Applicable to Downflow Units)
74
Optional) Connecting the T/H Sensor Outside the Cabinet
74
Optional) Connecting the Direct Free-Cooling Plenum
76
Optional) Connecting a Differential Pressure Sensor
77
Optional) Connecting an Upflow Differential Pressure Sensor
77
Optional) Connecting a Downflow Differential Pressure Sensor
78
Optional) Installing a Cap (Applicable to Upflow Units)
80
Installation Verification
83
4 Commissioning
86
Preparing for Power-On
86
Power-On
86
Home Screen
93
Menu Structure
95
Initial Configuration
96
Setting Temperature and Humidity Values and Enabling T/H Sensors
96
Optional) Setting the Pressure Difference Control
98
Setting Teamwork Control Parameters
99
Setting Communications Parameters
107
Setting Communications Parameters (Modbus RTU Protocol)
107
Setting Communications Parameters (Modbus TCP Protocol)
108
Setting Communications Parameters (SNMP Protocol)
109
Optional) Setting WIFI Parameters
113
Correlation Relationship of Parameters
114
Startup
116
Startup Wizard
120
Optional) Power-Off
123
Antifreeze Handling
124
Checking after Commissioning
126
5 Webui
127
Preparations and Webui Login
127
Webui Introduction
129
6 System Operation and Maintenance
132
Routine Maintenance Overview
132
Monthly Maintenance
133
Semiannual Maintenance Items
134
Annual Maintenance
136
Alarm References
136
Troubleshooting
160
Parts Replacement
164
Replacing the Air Filter
164
Replacing the Air Filter (Upflow)
164
Replacing the Air Filter (Downflow)
165
Replacing the Wet Film Humidifier
165
Replacing the Differential Pressure Switch
168
Replacing a T/H Sensor
169
Replacing the Water Valve Actuator
171
Replacing the Fan
173
Replacing the Fan (Upflow)
174
Replacing the Fan (Downflow)
178
Replacing the PSU
182
Replacing the Electric Heater
184
Replacing the Electric Heater (Upflow)
184
Replacing the Electric Heater (Downflow)
186
Replacing Inlet Solenoid Valve
188
Replacing the LCD
188
7 Faq
190
Operations on the LCD
190
Querying Temperature and Humidity Curves
190
Querying Logs
191
Querying Component Status
191
Querying System Parameters
192
Querying Version Details
192
How to View Teamwork Control Information
193
How to Silence the Buzzer
193
How Can I Handle Active Alarms
193
Clearing the Runtime
195
Calibrating a Sensor
195
How to Modify a Password
196
How to Set Alarm Parameters
197
How to Commission Single Component
198
Restoring Factory Settings
199
Which Parameters Are Restored to Default Values after Default Settings Are Operated
200
Rectifying Faults of the E-Label Identification Board
201
Exporting Data
202
How to Export and Import a Configuration File
203
How to Import a Certificate and a Key
205
Webui Operations
206
How to Manage Webui Users
207
How to Install a Network Security Certificate
208
How Can I View Active Alarms and Historical Alarms
209
How Can I Export or Import a Configuration File
209
How Can I Export Fault Information
210
How Can I Change the Smart Cooling Product IP Address on the Webui
210
How Can I View Version Information
211
A Glycol Adding Requirements
212
B Base Dimensions
213
C Electrical Conceptual Diagram
217
D Parameter Description
219
E Acronyms and Abbreviations
235
Advertisement
Huawei NetCol8000-C070 Quick Manual (32 pages)
In-room Chilled Water Smart Cooling Product
Brand:
Huawei
| Category:
Water Dispenser
| Size: 4.91 MB
Table of Contents
Installing the Cabinet
5
Connecting Cables
15
Installation Verification
24
Equipment Power-On
25
Routine Maintenance
28
Appendix 1: Base Dimensions
28
Appendix 2: Precautions against Adding Glycol
31
Huawei NetCol8000-C070 Quick Manual (22 pages)
Chilled Water Smart Cooling Product
Brand:
Huawei
| Category:
Water Dispenser
| Size: 2.36 MB
Table of Contents
Product Overview
2
Installing the Cabinet
3
Connecting Cables
11
Installation Verification
18
Equipment Power-On
18
Appendix 1: Precautions against Adding Glycol
21
Huawei NetCol8000-C070 Quick Manual (21 pages)
Chilled Water Smart Cooling Product
Brand:
Huawei
| Category:
Accessories
| Size: 2 MB
Table of Contents
Product Overview
2
Installing the Cabinet
3
Connecting Cables
10
Installation Verification
15
Equipment Power-On
15
Appendix 1: Precautions against Adding Glycol
18
Appendix 2: Base Dimensions
18
Advertisement
Related Products
Huawei NetCol8000-C130
Huawei NetCol8000-C190
Huawei NetCol8000-A100
Huawei NetCol8000-A050
Huawei NetCol8000-A050D
Huawei NetCol8000-A100D
Huawei NetCol8000-A055D
Huawei NetCol8000-A045
Huawei NetCol8000-A055
Huawei NetCol8000-A060
Huawei Categories
Cell Phone
Network Router
Wireless Router
Modem
Inverter
More Huawei Manuals
Login
Sign In
OR
Sign in with Facebook
Sign in with Google
Upload manual
Upload from disk
Upload from URL