Sign In
Upload
Manuals
Brands
LG Manuals
Air Conditioner
LSN090HSV5
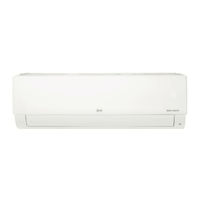
User Manuals: LG LSN090HSV5 Ductless Heat Pump
Manuals and User Guides for LG LSN090HSV5 Ductless Heat Pump. We have
3
LG LSN090HSV5 Ductless Heat Pump manuals available for free PDF download: Installation Manual
LG LSN090HSV5 Installation Manual (65 pages)
STANDARD WALL-MOUNTED INDOOR UNIT
Brand:
LG
| Category:
Air Conditioner
| Size: 8.79 MB
Table of Contents
Safety Instructions
3
Table of Contents
7
Unit Nomenclature
8
Multi F Multi-Zone Systems — Indoor Units
8
Introduction
9
Multi F and Multi F MAX Standard Wall-Mounted Units
9
Installation Personnel
9
Required Tools/Parts
9
Included Parts
10
Multi F Standard Wall-Mounted Indoor Units
10
General Data
11
R410A Refrigerant
11
Specifications
12
Multi F Multi Zone Standard Wall-Mounted Indoor Unit Specifications
12
Dimensions
13
Refrigerant Piping Diagram
15
Wall-Mounted Indoor Unit Refrigerant Flow Diagram
15
Wall-Mounted Indoor Unit Refrigerant Pipe Sizes
15
Wall-Mounted Indoor Unit Refrigerant Pipe Connections
15
Installation
16
Unpack and Inspect for Freight Damage
16
Indoor Unit Location Selection
17
Installing Near a Heat or Steam Source
17
Required Clearances
18
Installing in an Area Exposed to Unconditioned Air
18
Standard Wall Mount Indoor Unit Ceiling Clearance
18
Standard Wall Mount Indoor Unit Clearance Requirements
18
Indoor Unit Connections
18
Choose Piping and Wiring Route
19
General Guidelines — HVT and HSV5 Wall-Mounted Indoor Units
19
Drilling the Piping Hole in the Wall
19
Preparing for Installation
20
Mounting the Installation Plate to the Wall
20
Installation Plate Attaching Screw Placement
20
Removing the Indoor Unit Bottom Cover
21
Latch over Screws on Indoor Unit Bottom Panel
21
Remove Screws from Bottom Panel.
21
Remove Bottom Panel
21
Back of Bottom Cover Completely Removed from Indoor Unit
22
Bottom Cover with Top and Middle Unsnapped, Front View
22
Close up of Bottom Cover Connections
22
Mounting the Indoor Unit to the Installation Plate
23
Attaching the Indoor Unit to the Installation Plate
23
Finishing Indoor Unit Installation to the Wall Plate
23
Indoor Unit Connections
24
Preparing for Piping/Electrical Connections
24
Positioning the Indoor Unit Piping/Electrical Connections
24
L-Bracket Closed
24
Improper Piping Bending
25
Keep Piping Straight
25
Piping Installation When Piping Is on the Left Side
25
Using a Conduit for Indoor Unit Wiring/Cable Installation
26
Piping Installation When Piping Is on the Right Side
26
Liquidtight 3/4 Inch Elbow Connector Attached to Flexible Conduit
26
Bundling
27
Bundling the Connection Components
27
Cutaway of Proper Pipe and Cable Bundling
27
Flaring Procedure
28
Tightening the Flare Nuts
29
Loosening the Flare Nuts
29
Multi F with LGRED Outdoor Unit to Indoor Unit Piping Connections
30
Indoor Unit Pipe Sizes
30
Connection Socket Dimensions
30
Indoor Unit Piping Connections
30
Installing Field Piping to the Outdoor Unit Piping Connections
31
Using the Connection Socket
31
Connection Socket Installation
31
Close up of the Field Piping to Outdoor Unit Piping Connection
31
Multi F MAX with LGRED Outdoor Unit System Piping Connections
32
Branch Distribution to Indoor Unit Piping Connections
32
Branch Distribution Ports to Indoor Units
32
Installing Field Piping to Branch Distribution Unit Piping Connections
33
Connection Socket Diagram, External View
33
Close up of Branch Distribution to Indoor Unit Piping Connections
33
Socket Connection
34
Outdoor Unit or Branch Distribution Unit to Indoor Unit Connections
34
Indoor Unit Condensate Drain Hose Installation
35
Flexible Drain Hose Connection
35
Correct Slope Angle for Drain Hose
35
HVT and HSV5 Outdoor Unit Drain Hose Extension
35
Condensate Drain Hose Installation
36
Drain Hose Insulation
36
Checking the Indoor Unit Drain Hose for Leaks
36
Incorrect Slope Angles for the Drain Hose
36
Refrigerant Piping System Insulation
37
Typical Air-Conditioned Location
37
Special Air-Conditioned Location
37
Insulation Guidelines for Typical and Special Circumstances
37
Installing Refrigerant Piping Insulation
38
Typical Unconditioned Location
38
Typical Refrigerant Line Flare Fitting Insulation Detail
38
Insulating the Piping
38
Safety Gguidelines
39
General Information
39
Wiring
39
Adding a Ring Terminal to the Wiring
40
Close up of a Typical Ring Terminal
40
Comunication Cable Connections
40
Power Wiring
40
LG Terminal Connections
41
Power Supply
41
Power Wiring Specifications
41
Cable Diagram
42
Communication
42
Connection Cable Specifications
42
Wiring Diagram
42
Schematic of System When the Wiring Is more than 130 Ft
43
System Schematic if Wiring Is Less than 130 Ft
43
Communication Cables from Indoor Units to Remote Controllers
44
Controller Options
44
Examples of Indoor Unit to Zone Controller Connection
44
Accessories for some Group Control Applications
45
Communication Cables between Multiple Indoor Units Operating as Group
45
Example of Indoor Unit Group to Zone Controller Connections
45
General Specifications
45
Communication Cable
46
Connecting to the Power Wiring
46
HVT Indoor Unit Wiring Installation Procedure
46
Indoor Unit Electrical Connections
46
Cable Installation When Piping Is on the Left/Right Side
47
Indoor Unit Knockout
47
Indoor Unit Terminal Block with Ground Cable
47
LMN079HVT, LMN159HVT, LMN249HVT Indoor Unit Wiring Diagram
48
Connecting to Indoor Unit Terminal Block
49
Indoor to Outdoor Unit/Branch Distribution Unit Terminal Connections
49
Power Wiring / Communication Cable Connections
49
Connecting the Power Wiring
50
HSV5 Indoor Unit Wiring Installation Procedure
50
Location of the Indoor Unit Terminal Block
50
Steps to Removing the Bottom Cover
50
Wiring When Piping Is on the Left/Right Side
51
LSN090HSV5, LSN120HSV5, LSN180HSV5 Indoor Units Wiring Diagram
52
Indoor to Outdoor, Branch Distribution Unit Terminal Connections
53
Optional Wall-Mounted Sensor and Controller
54
Wall-Mounted Sensor Installation
54
Wired Controller Installation
54
Final Installation Procedures
55
Reattaching the Bottom Panel
55
Reattaching the Indoor Unit Panels - HVT
55
Reattaching the Screws on the Bottom Panel
55
Inserting Bottom Cover Hinges into the Indoor Unit Channels
56
Reattaching the Indoor Unit Bottom Cover
56
Securing the Bottom Cover C-Hooks to Indoor Unit Sockets
56
Snapping the Top Left and Right Sides
56
Air Filter Disassembly and Assembly
57
Installing Batteries into the Handheld Remote Controller
58
Decoding the Error Display
59
Error Code Nomenclature Definitions
59
Error Codes
59
Troubleshooting Using Error Codes
59
Multi F / Multi F MAX with LGRED Outdoor Unit Error Codes
60
Installation Checklist
61
Advertisement
LG LSN090HSV5 Installation Manual (63 pages)
STANDARD WALL-MOUNTED INDOOR UNIT
Brand:
LG
| Category:
Air Conditioner
| Size: 9.72 MB
Table of Contents
Safety Instructions
3
Table of Contents
7
Unit Nomenclature
8
General Data
11
R410A Refrigerant
11
Dimensions
13
Refrigerant Piping Diagram
15
Installation
16
Unpack and Inspect for Freight Damage
16
Indoor Unit Location Selection
17
Required Clearances
18
Indoor Unit Connections
18
Choose Piping and Wiring Route / Drilling Piping Hole
19
Preparing for Installation
20
Mounting the Indoor Unit
23
Flaring Procedure
28
Outdoor Unit to Indoor Unit Connections
30
Condensate Drain Hose Installation
35
Piping Insulation
38
Wiring
39
Safety Guidelines / General Information
39
Indoor Unit Electrical Connections
45
Power Wiring / Communication Cable Connections
48
Optional Wall-Mounted Sensor and Controller
53
Final Installation Procedures
54
Reattaching the Indoor Unit Bottom Panel
54
Air Filter Disassembly and Assembly
56
Installing Batteries
57
Troubleshooting
58
Error Codes
58
Installation Checklist
60
LG LSN090HSV5 Installation Manual (54 pages)
STANDARD WALL-MOUNTED INDOOR UNIT
Brand:
LG
| Category:
Air Conditioner
| Size: 7.28 MB
Table of Contents
Table of Contents
3
Safety Instructions
4
Introduction
9
Unit Nomenclature
11
General Data
12
Specifications
13
Typical Multi F/Multi F Max Systems
15
Refrigerant Piping Requirements
17
General Installation Guidelines
18
Location Selection
18
Inspection
19
Install Wall-Mounted IDU Chassis
20
Refrigerant Piping
22
Piping Materials and Handling
30
Piping Preparation
31
Piping Connections
32
IDU to ODU
32
Piping Insulation
35
Drain Piping
37
Electrical Wiring
38
Power Wiring Specifications and Best Practices
39
Controller Options
40
Indoor Unit Electrical Connections Guidelines
41
Indoor Unit Electrical Connections Procedure
42
Self Diagnosis Functions
44
LG SIMS - Self Diagnosis Functions
46
Optional Wall-Mounted Sensor and Controller
48
Troubleshooting
49
Error Codes
49
Cautions for Refrigerant Leaks
50
Refrigerant Leaks
50
Installation Checklist
51
Advertisement
Advertisement
Related Products
LG LSN090HE
LG LSN090CE, LSN120CE, LSN180CE, LSN240CE, LSN090HE, LSN120HE, LSN180HE, LSN240HE, LSU090CE, LSU120CE, LSU180CE, LSU240CE, LSU090HE
LG LSN090HYV
LG LSN090HSV4
LG LSN090HEV1
LG LSN090HEV2
LG LSN090HSV
LG LSN090HXV
LG LSN092CE
LG LSN091HSV3
LG Categories
Cell Phone
Monitor
LED TV
Washer
Air Conditioner
More LG Manuals
Login
Sign In
OR
Sign in with Facebook
Sign in with Google
Upload manual
Upload from disk
Upload from URL