Sign In
Upload
Manuals
Brands
Panasonic Manuals
Projector
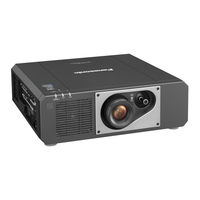
PT-FRZ60BU
Panasonic PT-FRZ60BU Manuals
Manuals and User Guides for Panasonic PT-FRZ60BU. We have
1
Panasonic PT-FRZ60BU manual available for free PDF download: Operating Instructions Manual
Panasonic PT-FRZ60BU Operating Instructions Manual (186 pages)
Brand:
Panasonic
| Category:
Projector
| Size: 25.55 MB
Table of Contents
Read this First! Chapter
1
Table of Contents
2
Chapter 1 Preparation
16
Precautions for Use
17
Intended Use of the Product
17
Lens Protection Material
17
Cautions When Transporting
17
Cautions When Installing
17
Security
19
Digital Link
20
Art-Net
20
Application Software Supported by the Projector
20
Storage
20
Disposal
20
Cautions on Use
20
Accessories
22
Optional Accessories
23
About Your Projector
24
Remote Control
24
Projector Body
25
Preparing the Remote Control
28
Inserting and Removing the Batteries
28
When Using the Multiple Projectors
28
Chapter 2 Getting Started
29
Setting up
30
Usable Outlet
30
Installation Mode
30
Parts for Installation (Optional)
31
Projected Image and Throw Distance
31
Connecting
34
Before Connecting
34
Connecting Example: AV Equipment
34
Connecting Example: Computers
35
Connecting Example Using DIGITAL LINK
36
Chapter 3 Basic Operations
38
Switching On/Off the Projector
39
Connecting the Power Cord
39
Power Indicator
39
Switching on the Projector
40
When the Initial Setting Screen Is Displayed
41
When the Administrator Account Setting Screen Is Displayed
44
Making Adjustments and Selections
45
Switching off the Projector
46
Projecting
48
Selecting the Input Signal
48
Adjusting the Image
49
Adjusting Adjustable Feet
50
Adjustment Range by the Lens Position Shift (Optical Shift)
50
Operating with the Remote Control
51
Using the Shutter Function
51
Using the Mute Function
51
Adjusting the Volume
52
Using the Freeze Function
52
Using the On-Screen Display Function
52
Using the Automatic Setup Function
53
Using the Screen Adjustment Function
53
Switching the Image Aspect Ratio
54
Using the Function Button
54
Displaying Internal Test Pattern
54
Using the Status Function
54
Using the ECO Management Function
55
Using the HDMI-CEC Function
55
Setting ID Number of the Remote Control
55
Chapter 4 Settings
57
Menu Navigation
58
Navigating through the Menu
58
Main Menu
59
Sub-Menu
60
[PICTURE] Menu
63
[Picture Mode]
63
[Contrast]
63
[Brightness]
63
[Color]
64
[Tint]
64
[Color Temperature]
64
[White Gain]
65
[Gamma]
66
[Daylight View]
66
[Sharpness]
66
[Noise Reduction]
67
[Dynamic Contrast]
67
[System Selector]
67
[Off]
67
Srgb-Compliant Video
68
[POSITION] Menu
69
[Shift]
69
[Aspect]
69
[Zoom]
70
[Off]
70
[Clock Phase]
71
[Screen Adjustment]
71
[Off]
71
[ADVANCED MENU] Menu
74
[Digital Cinema Reality]
74
[Blanking]
74
[Input Resolution]
75
[Clamp Position]
75
[Edge Blending]
75
[Frame Response]
77
[Raster Position]
77
[DISPLAY LANGUAGE] Menu
78
Changing the Display Language
78
[DISPLAY OPTION] Menu
79
[Color Matching]
79
[Color Correction]
80
[Screen Setting]
80
[Auto Signal]
81
[Auto Setup]
81
[Computer In/Out]
82
[Hdmi In]
84
[Digital Link In]
85
[On-Screen Display]
87
[Closed Caption Setting]
89
Signal Input Only)
89
[Back Color]
89
[Startup Logo]
90
[Uniformity]
90
[Default Logo]
90
[Shutter Setting]
91
[Off]
91
[Freeze]
92
[Waveform Monitor]
92
[Cut Off]
93
[PROJECTOR SETUP] Menu
94
[Projector ID]
94
[Projection Method]
94
[All]
94
[Eco Management]
95
[Off]
96
[Brightness Control]
98
[Schedule]
102
[Initial Startup]
104
[Startup Input Select]
104
[Last Memory]
104
[Last Used]
104
[Function Button]
105
[Audio Setting]
106
[DC Out]
107
[Status]
108
[Date and Time]
109
[Save All User Data]
109
[Load All User Data]
110
[Hdmi Cec]
110
[Initialize]
112
[Service Password]
112
[TEST PATTERN] Menu
113
[Test Pattern]
113
[SIGNAL LIST] Menu
114
Registering New Signals
114
Renaming the Registered Signal
114
Deleting the Registered Signal
114
Protecting the Registered Signal
115
Expanding Signal Lock-In Range
115
Sub Memory
116
[SECURITY] Menu
117
[Security Password]
117
[Security Password Change]
117
[Display Setting]
117
[Text Change]
118
[Control Device Setup]
118
[Control Device Password Change]
119
[NETWORK] Menu
120
[Ethernet Type]
120
[Digital Link]
120
[Wired Lan]
122
[Projector Name]
122
[Network Status]
122
[Administrator Account]
123
[Network Control]
125
[Pjlink]
125
[Art-Net]
127
Chapter 5 Operations
129
Network Connection
130
Connecting to the Network
130
Web Control Function
133
Computer that Can be Used for Setting
133
Accessing from the Web Browser
133
Using HDMI-CEC Function
150
Connecting a CEC-Compatible Device
150
Setting the Projector and CEC-Compatible Device
150
Operating the CEC-Compatible Device with the Projector Remote Control
150
About the Link Control
151
Updating the Firmware
152
Updating the Firmware Via LAN
152
Chapter 6 Maintenance
157
Light Source/Temperature Indicators
158
When an Indicator Lights up
158
Maintenance
160
Before Maintaining the Projector
160
Troubleshooting
161
[SELF TEST] Indications
163
Chapter 7 Appendix
165
Technical Information
166
Using the Pjlink Function
166
Using Art-Net Function
167
Control Commands Via LAN
170
SERIAL IN> Terminal
172
COMPUTER 1 IN> Terminal/<Computer
175
Signal Names
175
List of Compatible Signals
176
Specifications
179
Dimensions
182
Precautions for Attaching the Ceiling Mount Bracket
183
Index
184
Advertisement
Advertisement
Related Products
Panasonic PT-FRZ68C series
Panasonic DLP PT-FRZ60
Panasonic DLP PT-FRZ60W
Panasonic DLP PT-FRZ60B
Panasonic PT-FRZ60BEJ
Panasonic PT-FRZ60WEJ
Panasonic PT-FRZ60WU
Panasonic DLP PT-FRZ50W
Panasonic DLP PT-FRZ50B
Panasonic PT-FRZ55BEJ
Panasonic Categories
Camcorder
Air Conditioner
TV
Digital Camera
Cordless Telephone
More Panasonic Manuals
Login
Sign In
OR
Sign in with Facebook
Sign in with Google
Upload manual
Upload from disk
Upload from URL